 |
 |

Introduction BBQ Guru is probably the biggest and oldest name in electronic BBQ temperature controls. The first BBQ temperature controller we ever reviewed was the BBQ Guru Competitor back in 2006. It was a basic controller with one pit probe to control your cooker and one food probe to monitor your food. It didn't have a numeric display of temperatures, but rather little rows of LEDs to show how far above or below a certain temperature you were. Since then, BBQ Guru has brought out the the DigiQ II, then the CyberQ II, then the NanoQ and PartyQ controllers in its line of basic controllers. All little metal bricks that provided great control for your cooker. Now here we are 15 years later with the BBQ Guru DigiQ DX3, the latest in this line of controllers. So, let's see if the DigiQ DX3 lives up to its ancestry! Here is a list of features and specifications for the unit from the DigiQ DX3 User's Guide:
Compared To Other BBQ Temperature Controllers Like most other temperature control systems, the DigiQ DX3 system is blower-based, controlling airflow through the cooker with a blower. As a basic controller, there is no Wi-Fi, Bluetooth, web or cloud connections. All control and readout is provided by the unit itself. The DigiQ DX3 also provides a complete set of features like Open Lid Detect, Ramp Mode, and Smart Cook that are missing from some other controllers. We recently reviewed the BBQ Guru DynaQ and UltraQ models, so we thought we'd include a short comparison between the DIGIQ DX3 and the DynaQ and UltraQ models so you can see all three of BBQ Guru's current models:
The basic DigiQ DX3 package comes with the following items:
If you have purchased a temperature controller from BBQ Guru before, you may already have a blower and adapter. If not, when you order your DigiQ DX3, you must also purchase:
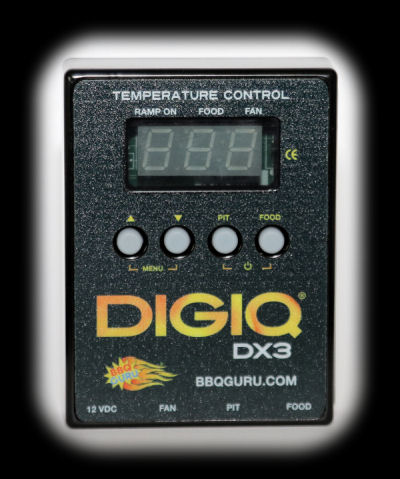
A Few Observations About The Components The DigiQ DX3 innards are housed in a solid metal case that we suspect would survive an atomic blast. It is moisture resistant, but not waterproof. In other words, keep it protected from hard rain, and don't submerse it. The power supply should also be protected from large amounts of water and submersion. The temperature probes all have braided stainless steel insulation, are protected from smoke and moisture, and are now dishwasher safe. The Pit Viper blower is described as "moisture resistant." The new plastic case on the Pit Viper certainly will better resist the intrusion of moisture into the blower than the original blower's stainless steel plate. And with the air intake on the new blower being more covered, there should be less chance for splashing rain entering from below in a heavy rainfall. In general, everything feels sturdy and well built. The DigiQ DX3 unit is a small metal brick about 3½" x 2⅝" x ⅞" (89mm x 67mm x 22mm) and weighing 5.2 ounces (147 grams). The case houses the electronics and has four control buttons on the front. There is no dedicated power switch, per se. The unit will power up when you connect the power supply. However, simultaneously pressing the PIT and FOOD buttons will turn the unit off and on. The back of the unit has two small metal lugs that can be used to mount the unit on the Universal Bracket. Finally, the unit has all the electrical connections along the bottom edge.
The DigiQ DX3 comes with a stainless steel universal bracket. It can be bent in a number of ways so as to be a stand that can hold the DigiQ DX3 in different positions. The two lugs on the back of the controller slide into the channels cut into the bracket. Below we show you one possible way to bend the bracket and hold the controller. Other possibilities are shown in the DigiQ DX3 User Guide.
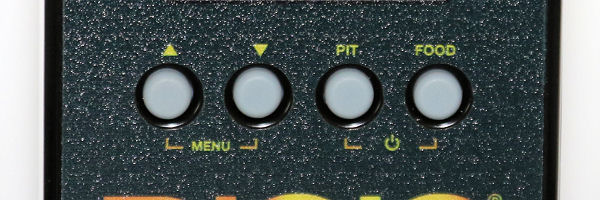
The DigiQ DX3 controller has four buttons on the front for controlling the functions of the unit, △, ▽, PIT and FOOD:
 The FOOD and PIT buttons when pressed simultaneously will turn the unit on and off. When pressed individually, the FOOD button switches the display to the current food temperature. The PIT button switches the display to the current pit temperature. The △ and ▽ buttons when pressed indvidually while displaying either the current pit or food temperature will alter the Pit Set Point or Food Set Point. If you press the △ and ▽ buttons simultaneously, the setup menu is entered. Once in the setup menu, pressing the △ and ▽ buttons simultaneously will move you from one setup item to the next. Pressing The △ and ▽ buttons individually will allow you to change values for individual menu items. The following table shows how the Setup Menu operates:
We will describe all these functions, what they do and what values they have later on in the review. | |||||||||||||||||||||||||||||||||||||||||||||||||||||||||||||||||||||||||||||||
You can support this website by shopping at The Naked Whiz Website Store and Amazon.com
|