 |
 |
Interaction With The App
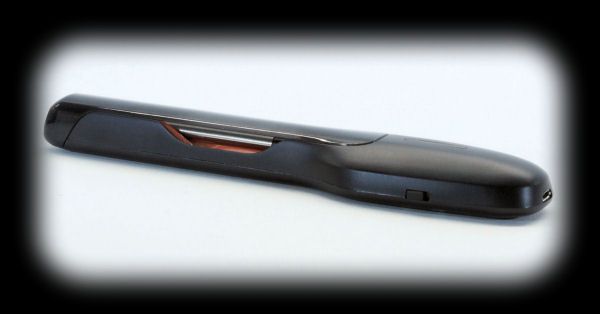
The ECPin probe comes with an app, of course, for iOS and Android. Let's take a look at how the Range
Repeater shows up in the App. First, the basic probe entry in the list of active probes:
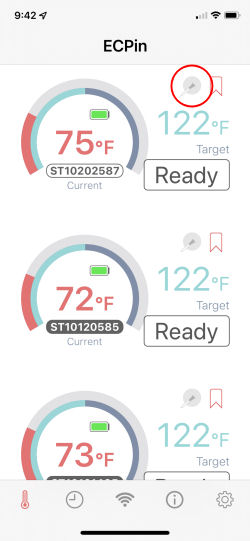
The probe icon (circled in red) is greyed out when the probe is out of range. |
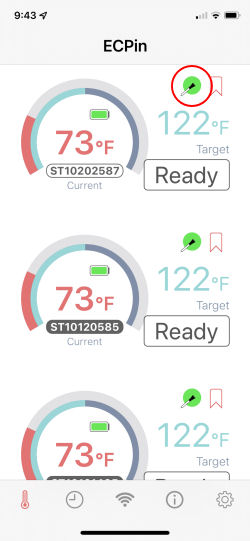
The probe icon has a green dot behind it when the probe is connected to your smart device. |
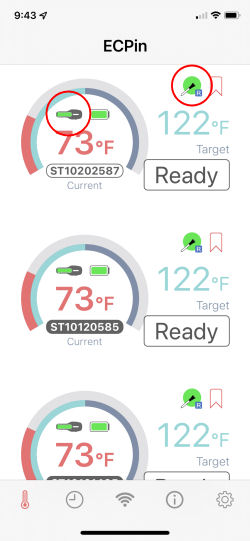
The probe icon also has a small "R" on it when the Range Repeater is turned on and connected. In addition, the Range Repeater icon appears next to the battery level indicator. |
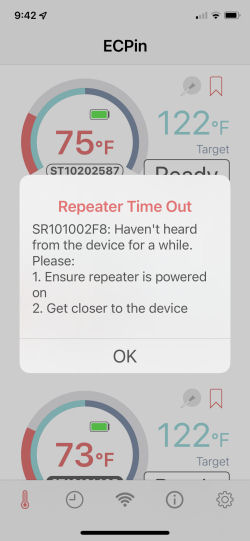
If you turn the Range Repeater off or if you move out of range, the Range Repeater icon will disappear and you will get this notification. |
Let's take a closer look at the Range Repeater icon. It contains an indication of its own AAA battery level:

Range Repeater icon showing the level of its AAA battery.
New Application Features
Since we first reviewed the ECPin probes, ECTherm has released new versions of their ECPin Pro App
which contain new features.
Probe Battery Alerts
The updated application now allows you to
set a battery charge level threshhold for the probes. When the battery charge level of any probe
drops below the threshhold you have set, you are notified through the App. In addition to being
notified, if a cook is in progress you are also given the opportunity to swap the cook to a new freshly-charged probe
(we'll show you that in the next section).

This is the settings screen where you can set the low battery level threshhold. |

When the battery level drops below the threshhold, you get this notification. |
Cook Swapping
The most glaring drawback of using ultra-capacitors instead of batteries to power the probes is the
need to recharge the probes every 4-5 hours. This makes long cooks problematic. However, ECTherm has
come up with a way to allow you to monitor a cook that lasts beyond the charge capacity of the probe.
At any time, you can swap your cook from your present probe to a new freshly-charged probe. (Needless to
say you have to remove the first probe from your meat and insert the new probe.) You are also
given the opportunity to swap your cook to another probe when you get a low battery notification. First,
let's look at just swapping your cook to another probe.
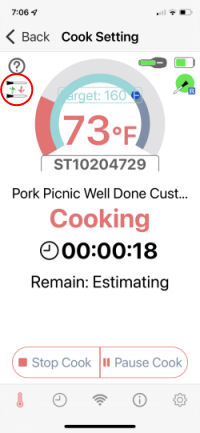
This screen shows a cook in progress on probe ST10204729. Tap on the swap icon in the upper left corner. |
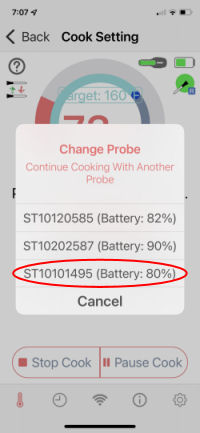
You will be shown a list of potential probes that you can swap the cook to. We tapped on probe ST10101495. |
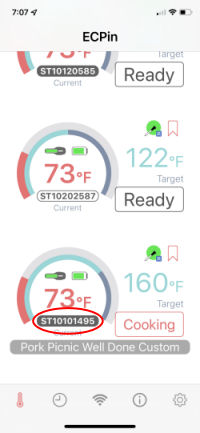
Now probe ST10101495 shows that it has the cook in progress. |
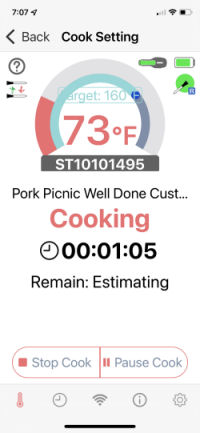
Tapping on probe ST10101495 takes you to the cook screen for that probe and you can see that all the cook information has been transferred to the new probe. |
You are also given a chance to swap your cook to another probe when you receive a low battery notification.
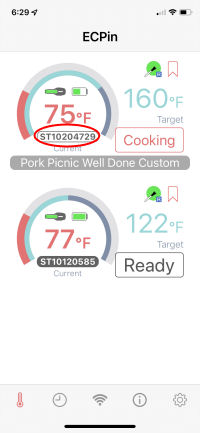
This screen shows a cook in progress on probe ST10204729. |
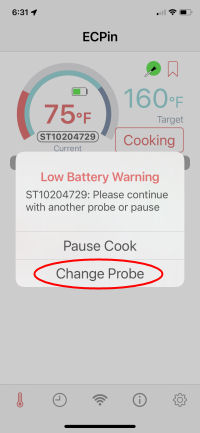
The battery level on this probe has fallen below the threshhold. In order to change your cook to a fresh probe, you can tap on "Change Probe." |
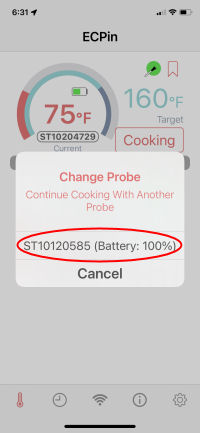
You are given a list of potential probes to swap your cook to. We tapped on probe ST10120585. |
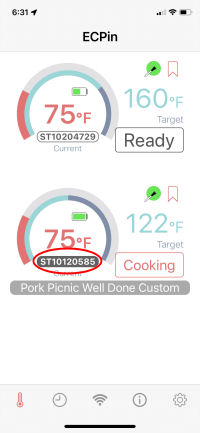
Now probe ST10120585 has the cook. |
We should also note that you are also given the option to pause your cook when the probe battery is low. If you only have one probe, you can pause the cook, quickly charge the probe you are using, reinsert the probe and then resume the cook.
Cook Time Estimate
The new App has also added cooking estimates to its cook function. It will now give you an
estimate on when your cook will finish. We cooked a small pork loin in order to show
you how this works:
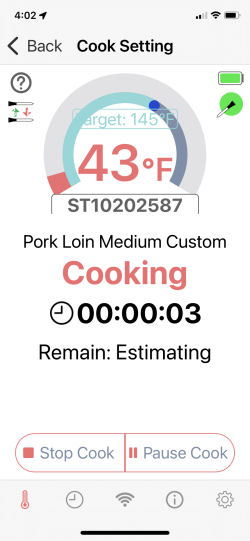
We created a cook for a pork loin with a target temperature of 145°F. Initially the app shows "Estimating" for the time remaining. |
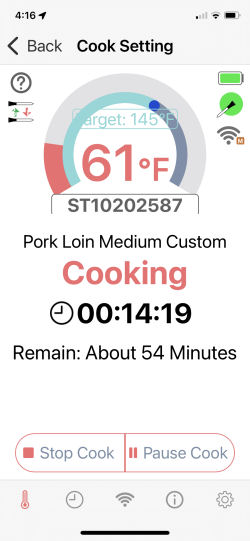
Just over 14 minutes into the cook we got our first estimate of 54 minutes remaining. |
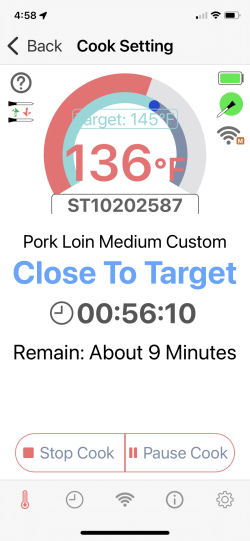
56 minutes into the cook we got our first warning that we were close to finishing. |
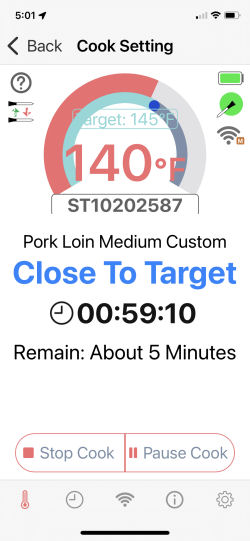
The "Close to Target" warning went away, but a few minutes later, we got another one. |
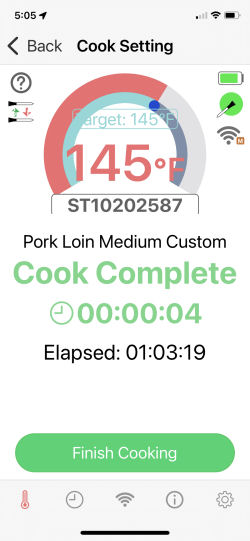
Finally at just over 63 minutes into the cook, we got the "Cook Complete" notification. |
So, how did the ECPin App do at predicting the finish time? Remember, the ECPin probes do not have ambient temperature sensors and therefore don't have the benefit of knowing the cooker temperature (or at least the temperature of the air around the meat). The following table shows the predictions made during the cook at random intervals:
| Elapsed Time | Time Remaining | Predicted Finish Time |
|---|---|---|
| 14:19 | 54:00 | 68:19 |
| 30:19 | 31:00 | 61:19 |
| 36:19 | 30:00 | 66:19 |
| 45:05 | 22:00 | 67:05 |
| 45:05 | 22:00 | 67:05 |
| 51:41 | 14:00 | 65:41 |
| 56:10 | 9:00 | 65:10 |
| 57:39 | 7:00 | 64:39 |
| 59:10 | 5:00 | 64:10 |
| 62:08 | 1:00 | 63:08 |
| 63:15 | Done | 63:15 |
The first prediction at 14 minutes into a 63-minute cook was only off by 5 minutes. 36 minutes in, the error was down to 3 minutes and progressively got smaller and smaller. Pretty impressive considering the lack of an ambient temperature sensor.
Cook Rest Timer
The last new feature of the App that we'll show you is the Resting Timer. If you use the Guided Cook
feature, with some cuts of meat you are given the option of entering Rest Time value. Also, if you choose
the Custom cooking option when doing a guided cook, you are always given the option of entering a value
for the Rest Time. So, if the App doesn't give you the option of entering a Rest Time for the cut of meat
you have selected, you can always just do a custom cook instead. Here's what setting up a Custom Cook looks like:
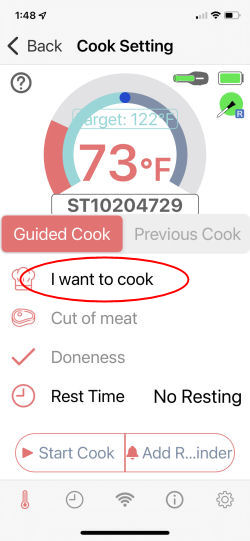
After you have tapped on the probe you are using, you will get this screen. Tap on "I want to cook". |
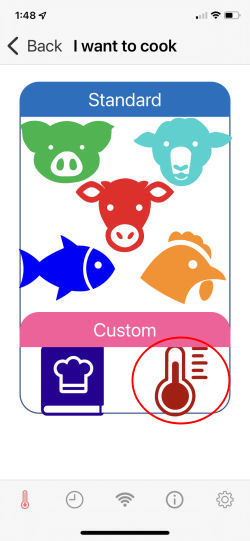
Tap on the image of the thermometer under Custom. |
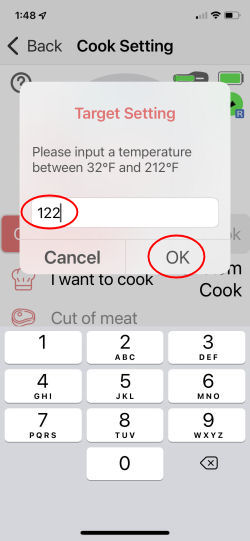
You are first prompted to enter your target food temperature. Enter your target and then tap on "OK". |
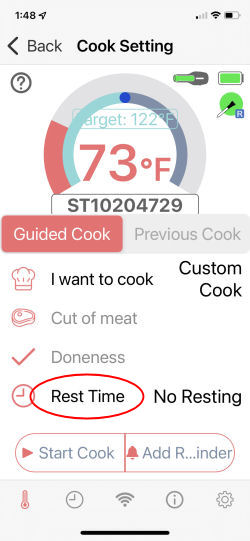
Tap on the "Rest Time" label. |
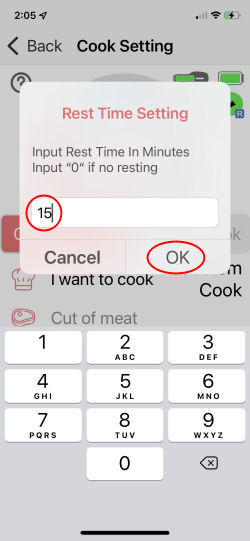
Enter your desired rest time and then tap on "OK". |

The rest time is now shown as your desired value, so tap on "Start Cook" to start the cook. |
Now, let's see how it works when actually cooking. We cooked a beef eye of round and specified a 15 minute rest time. Here's how it went:
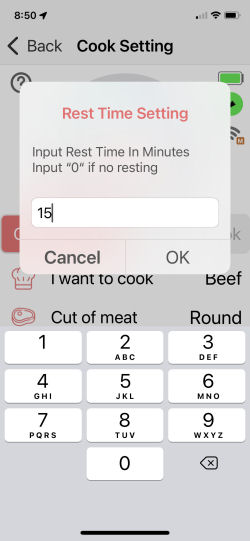
We selected Beef, Round, and Medium Rare. Then we were prompted for a rest time. We entered 15 minutes. |
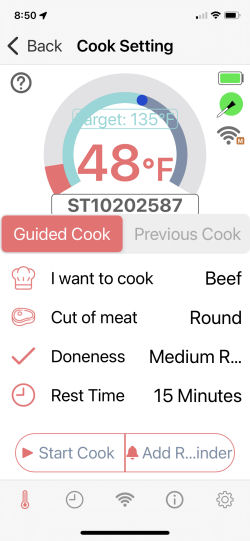
The App returns to the cook setting screen and you can see that the rest time of 15 minutes has been set. We tapped on Start Cook. |
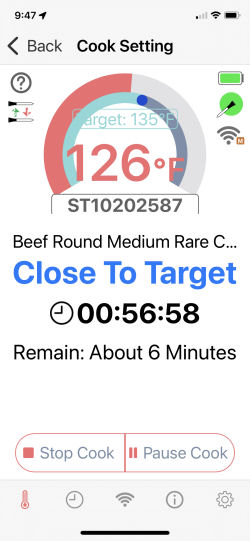
As you can see there is nothing different from a normal cook so far. |
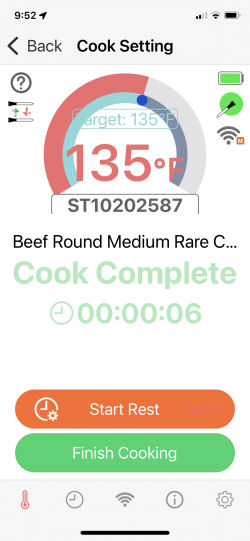
When the meat has reached the target temperature, in addition to the normal alert, you are also presented with a button to start the rest. |
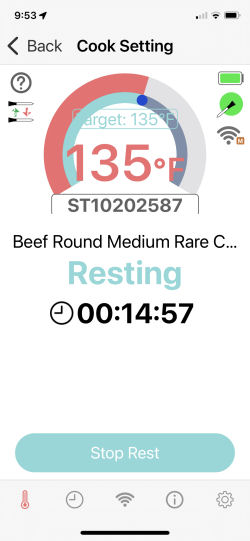
The App now counts down the Rest Timer, according to the value you specified. |
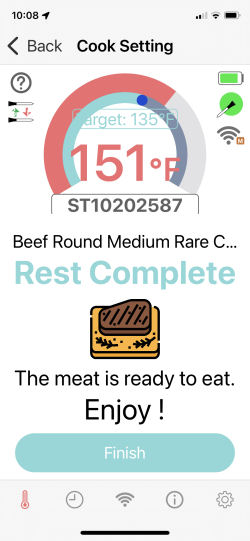
You are then notified when the resting time is complete. Note the 16°F carry over on this piece of meat. |
So now we see that the ECPin implementation of resting time is different from other products. With ECPin, you need to select the resting time and account for the carryover yourself. This is unlike other products which try to determine when to start resting and account for carryover based on the current meat temperature and how long it took to get there. The ECPin implementation really only provides a timer for you. You must figure out when to start resting and for how long yourself. Here's a photo on the left showing the 1.5 pound piece of beef eye-of-round that we cooked. The photo on the right shows what it looked like when we cut it open after resting.
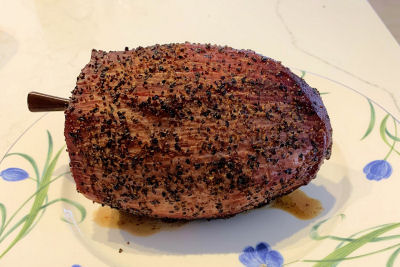
The 1.5 pound piece of beef eye-of-round that we cooked. |
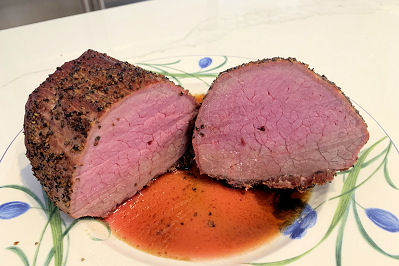
What the beef looked like when we cut it in half after resting. |
Cook Preservation
We don't know if this is a new feature or not so we have made up a name for it. We have noticed that with the
new App, you will not
lose your cook if you kill the App and then start it up again. When we did our initial review of the ECPin,
we found that killing the App meant that any cooks in progress were lost. No more.
You can support this website by shopping at The Naked Whiz Website Store and Amazon.com
|