|
Before We Begin...
Posting a photo to the Big Green Egg Forum isn't all that hard, but you have to understand a few things first.
- The photo is not uploaded to the Big Green Egg server. You have to find a place for it.
- The photo has to be placed on a server on the internet. It cannot be on your PC in your home.
- The photo has to be placed on a server that will allow the Big Green Egg Forum webpage to link to it. This is known as remote linking or direct linking. If the server doesn't allow other webpages to link to photos on it, then the photo won't show up in your post.
Yes, it sounds complicated, but lucky you! I'm here to help you! So where do you put your photo? If you have an ISP that provides you with web space, then you can upload your photos to your own web space and link to them there. However, I'm not here to teach you how to use your own web space. What follows is a way to post photos to the Big Green Egg Forum that is easy, free and will work every time if you follow the instructions.
Incidentally, if you this process doesn't work for you or you want a second opinion, here is a link to Tim M's How To Post A Photo Page.
Finally, you may find it helpful to print these instructions.
Click Here To Print These Instructions
(WARNING: The instructions are 23 pages long on an inkjet printer!)
How To Post A Photo The Free And Easy Way
We are going to show you how to use the Photobucket photo website to upload your photos to their website. Once you have done that, you can then link to them from the Big Green Egg Forum. Now, there are a lot of free photo posting services out there and you may be able to find one you like more. Also, we are not trying to promote Photobucket, we are just using them as a detailed example for the internet-challenged. However, the following procedure will work if you cannot figure out this whole photo-posting thing on your own. Oh, and in case you don't like "joining" something and giving them personal information, don't worry. All you have to give them is a valid email address. Go get a Hotmail or Yahoo email account if you don't want anyone to know your email address. (Photobucket doesn't reveal it, but then you might not want them to have it either.) So let's begin:
- Use your web browser to go to www.photobucket.com. The first time you visit, you will have to sign up, and this is the screen you will get. Click on "Sign Up Free":

- You then get this next screen.
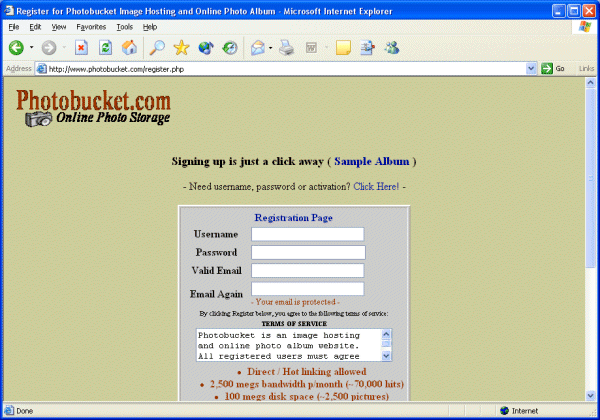
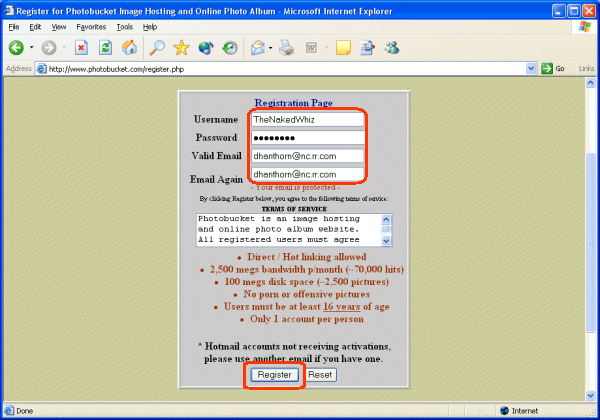
- Scroll down a little bit so you can see the entire registration box. Enter the name you wish to use for your account, a password and the email address that you wish to use. Note that you only get to enter the password once, so be sure you know what you type. Once you enter his information click on the "Register" button.
- You now will get the following screen letting you know that you have been registered. The next step is to go check the email account that you entered and look for an activation email from Photobucket.

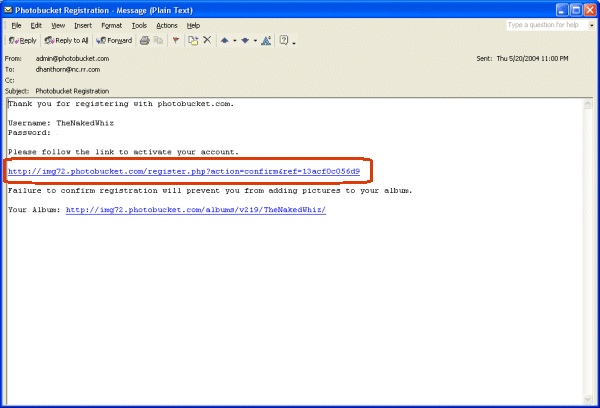
- Your email will look something like this. You can either then click on the activation link, or you can cut and paste the activation link into your web browser. (We have blanked out the password. Your email will contain your password.)
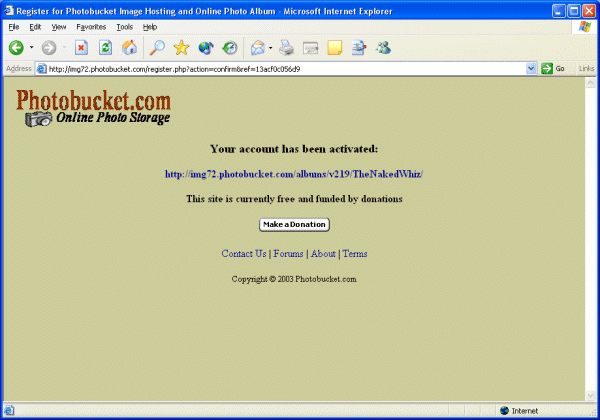
- This will take you to the following screen, and now you have completed registering and activating your account!
- Now when you visit www.photobucket.com, you will get this screen. Enter the name you registered with and click on the "Go" button:
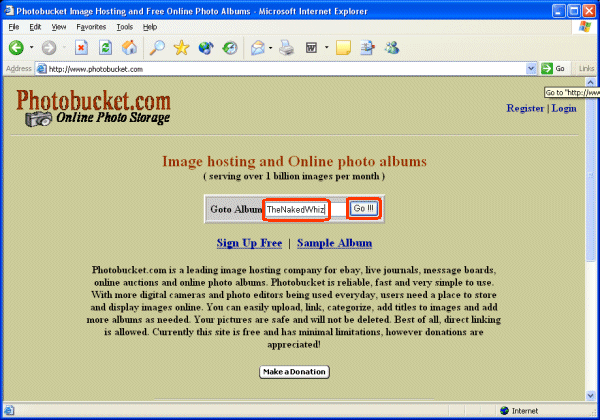
- This takes you to the signon screen. Enter your password and click on the "login" button.

- This will take you to the upload/gallery page. To upload photos, you can enter their name in the box, or you can click on the "Browse" button and select them from the browse box. Make sure the "Keep my picture names" box is checked if you want Photobucket to use the same file name that you do. Press on the "Submit" button and the photo will be uploaded.
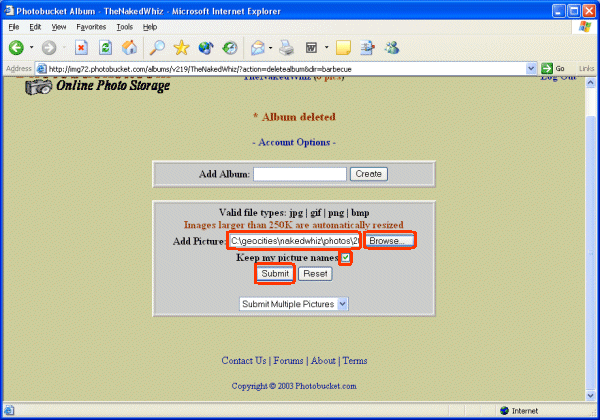
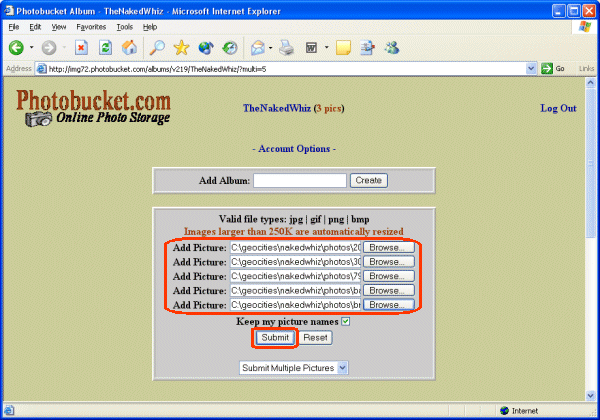
- If you want to upload multiple photos at the same time, you can click on the "Submit Multiple Pictures" drop down, and select the number of photos you want to upload at a time:

- Enter the names of the photos, or use the "Browse" buttons to specify the photos you want to upload, then click on the "Submit" button:
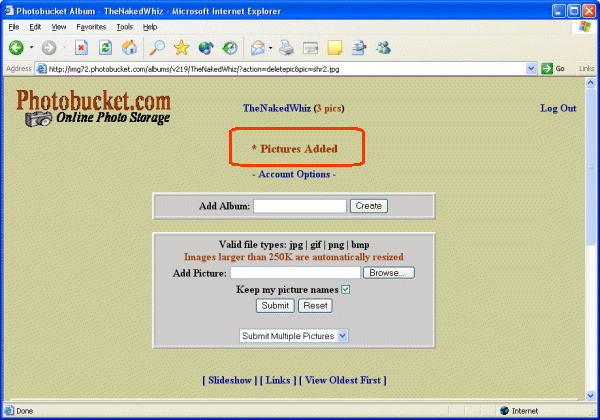
- Whether you upload one or several photos, when the upload is complete you will get the following screen indicating the photos have been successfully uploaded:
- Scroll down and the you will see a gallery of the photos that you have uploaded!
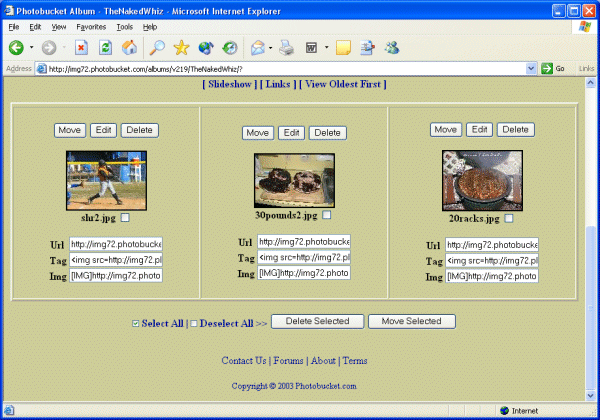
- Below each photo are three different ways of pointing to your photos, Url, Tag, and Img. First of all forget about "Img". You won't be able to use that on the Big Green Egg Forum. We'll show you examples later, but for now you should know that if you are going to use the "Image URL" field to post your photo, you want to cut and paste the value found in the "Url" field under the photo. If you are going to put a link to your photo in the body of your message, you need to cut and paste the value found in the "Tag" field under the photo:
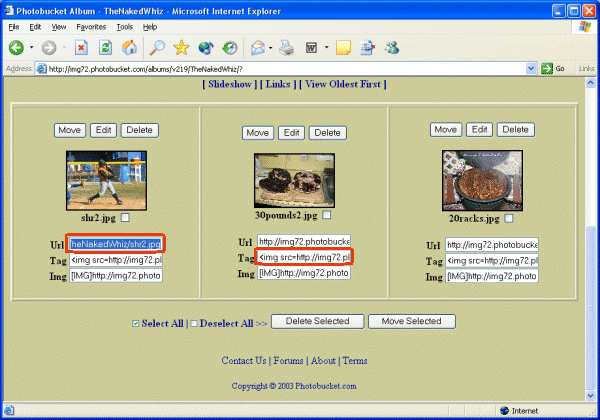
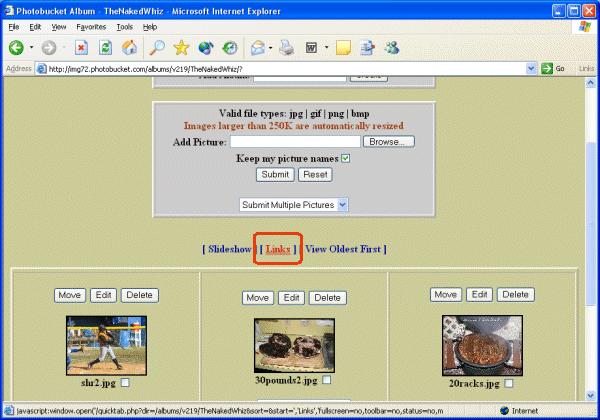
- So now, let's see how to post the photo on the Big Green Egg forum. If you want to see all the links to your photos, you can click on the "Links" link:
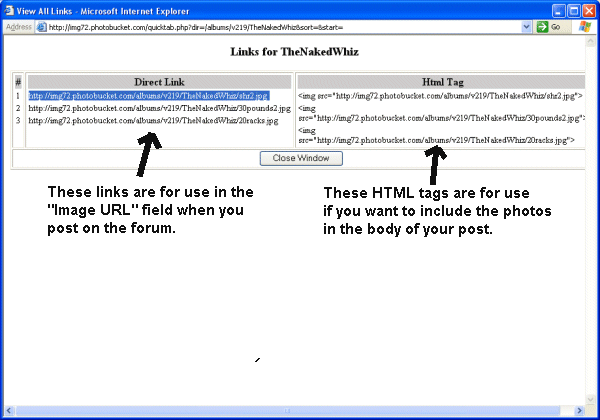
- You are presented with a list of links to all your photos. Let's first use the "Image URL" field to post a photo. Highlight the link to the photo you want to post and copy it.
- Paste the link into the "Image URL" field on your post. When you submit your post, the photo will appear at the top of the post.
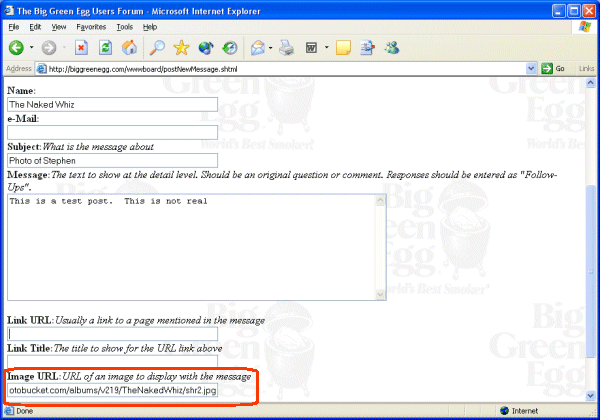
- Now let's put a photo into the body of a post. Highlight and copy the HTML Tag of the photo you want to post:
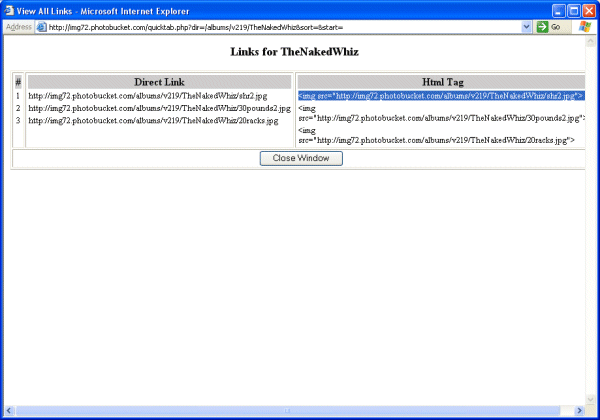
- Paste the HTML tag into the body of the post. When you submit the post, the photo will appear in your post, wherever you placed the tag.

How To Post Multiple Photos In The Same Post
The instructions above will allow you to post one photo per post. If you want to post multiple photos in the same post, you will need to be a little trickier.
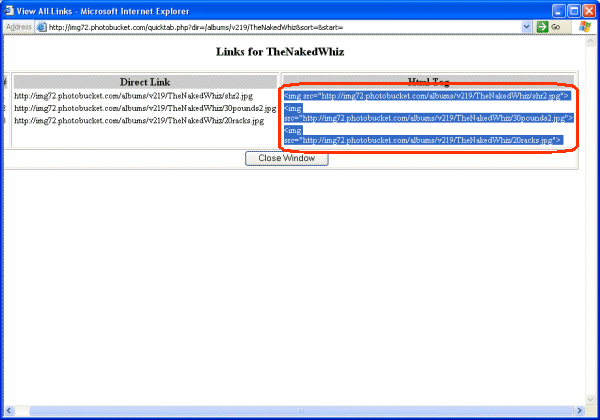
- Remember this screen? Copy the the HTML Tags of the photos to post. (You may have to do multiple copy and paste's to get all the photos you want. Here I have selected 3 photos that happen to be together in the list.)
- Paste the HTML tags into the body of the post. When you submit the post, the photos will appear in your post, wherever you placed the tags. Notice a couple of things. See how I put the "BR" tags between the photos? This will guarantee that the browser doesn't try to put the photos side by side and run them off the right side of the browser window. Alternatively, if you make sure you leave a blank line between each tag, the photos will also appear vertically and not side by side.
Also, do not split the HTML tags by hitting the ENTER key while the cursor is in a tag. Each tag has to be all run together and not split onto separate lines. In the example below, it looks like the tags are split, but that was done by the browser, not by splitting the lines with an ENTER key.
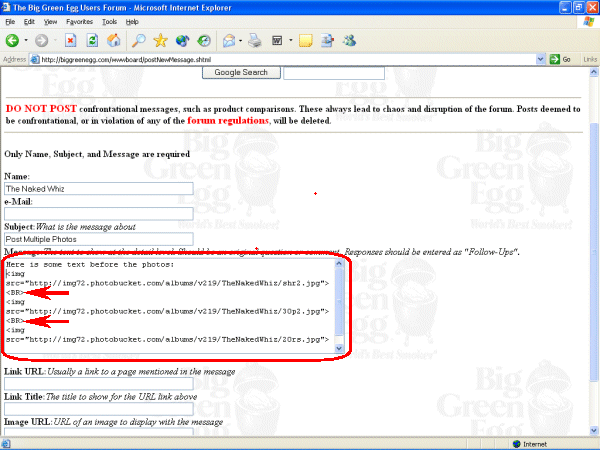
Be careful not to put a carriage return in the middle of that big long address. Leave it alone and let it wrap to the next line. If you modify the address in any way, the photo won't appear. By the way, the <BR> is called a "break". It ensures that a new line is started before the next photo is displayed. The <P> starts a new paragraph. It starts a new line and skips a line.
Some Final Notes About Posting...
- Size your photos to something reasonable like 640 x 480. That will ensure that everyone will be able to see them on their screens, and it keeps the size of the photo down so that people with slower connections don't have to wait forever for it to download.
- These instructions will also work for posting to the Primo Users Forum and Ray Basso's Barbecue Forum.
|


