 |
 |

The CyberQ Cloud will communicate with your smart devices via WiFi, giving you the ability to monitor your cook remotely from anywhere you have internet access. And the name of the CyberQ Cloud should tell you how it does this. It will connect to your wireless network and communicate with "The Cloud." You will then be able to use a web browser on any device in order to also communicate with "The Cloud" in order to monitor and control your CyberQ Cloud device. You can actually set up the WiFi function using the buttons and display on the CyberQ Cloud, but it is rather tedious and we recommend that you follow the instructions provided by BBQ Guru in their Networking Quick Start Guide. We will now show you how to go through this process, as simple as it is. There are three steps to enabling this function:
The first thing you should do is to create an account at www.sharemycook.com. This way, you will be ready to go when you want to connect your CyberQ Cloud to the website. Here's what you do. Click on the link "Click here to register". 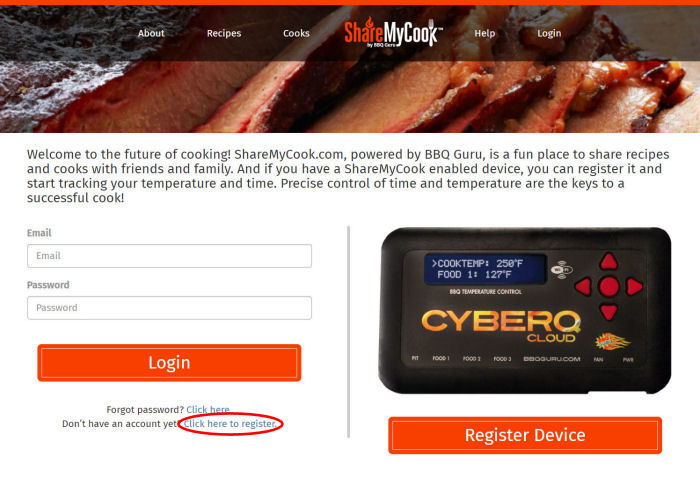 Fill in the appropriate fields and then click on the "Create Account" button.  The following screen will appear telling you that an email has been sent. Check your email, and click on the link provided in the email to verify your account. 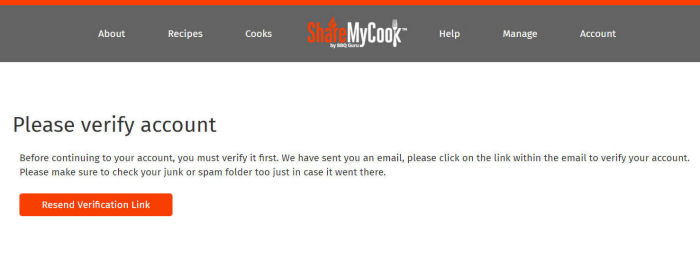 The following tab will open up in your browser to let you know that your account has been verified. Click on the ShareMyCook logo at the top of the screen to return to the Share My Cook dashboard.  Once you return to the Share My Cook Dashboard, you are ready to register your CyberQ Cloud after you set it up to connect to your network. 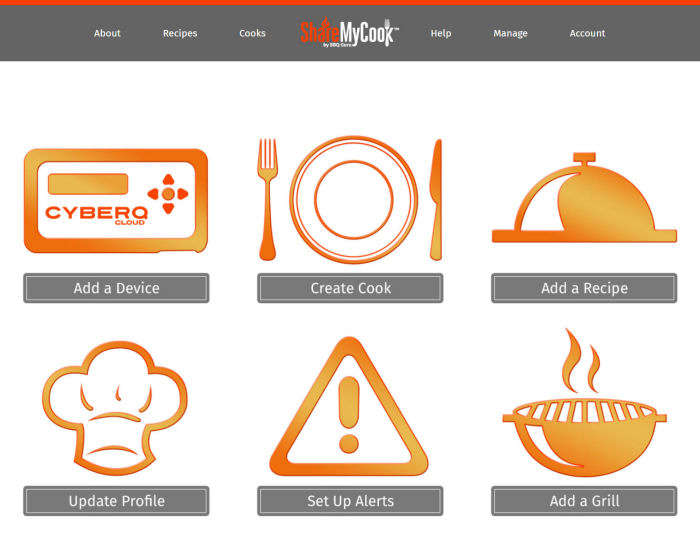
Now, to connect your CyberQ Cloud device to your network. When you turn on your CyberQ Cloud for the first time (and any time you turn it on BEFORE you connect it to your network), it will display the following message:  The CyberQ Cloud is in Hot-Spot mode, meaning that it has created its own little network that other devices can connect to. The first thing you need to do is connect your laptop, desktop, phone, etc. to the CyberQ Cloud while it is in Hot-Spot mode. Simply look for the CyberQ Cloud on your device in the list of available networks and connect: 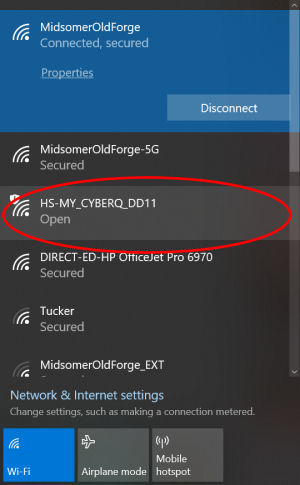 Once your device has connected with the CyberQ Cloud, the five red buttons will start flashing and you should see this message:  Your laptop, desktop, phone, etc. is now connected to the CyberQ Cloud in Hot-Spot mode and the CyberQ Cloud will now act like a web server. You can now open a browser window and enter the IP address that is showing on your CyberQ Cloud's display (in this case, 192.168.101.10) and the CyberQ Cloud will serve up the following web page. Click on the "WIFI Setup" link:
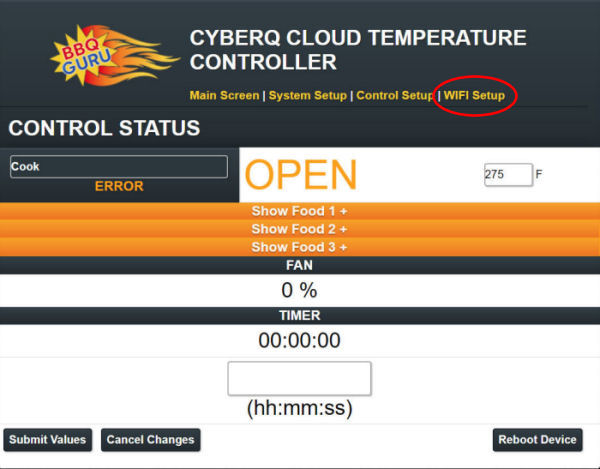 The CyberQ Cloud will then show you the WiFi Setup page. Click on the "Cloud Connection Wizard" button:
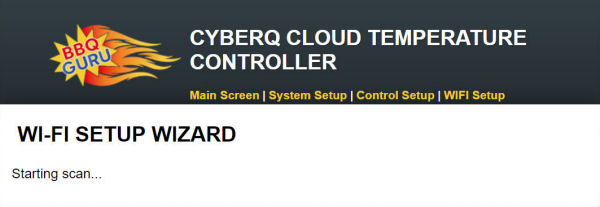
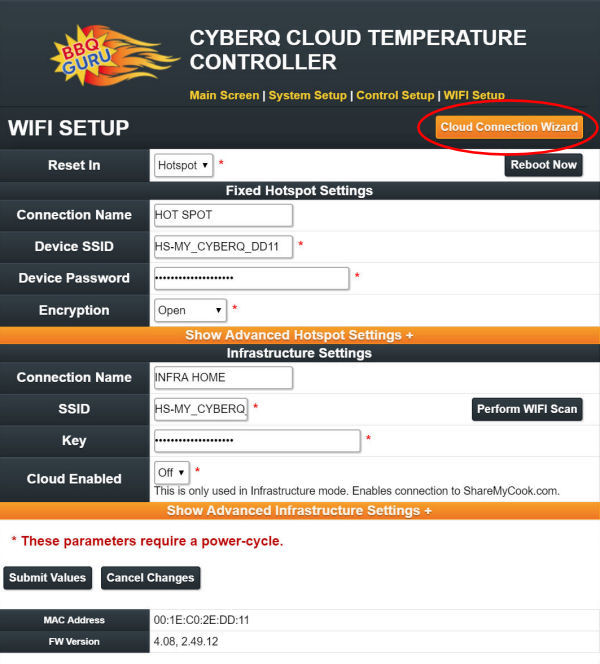 The CyberQ Cloud will now begin scanning for available networks.
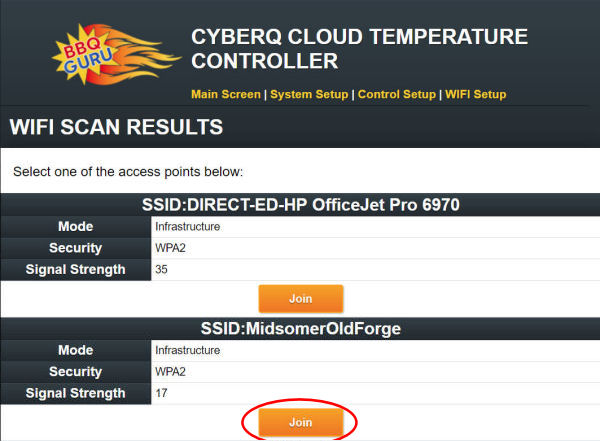
 You will then be presented with a list of available networks. Choose the network that you will be using and click on the "Join" button:
 You will then be asked to enter the password for your network. Simply enter it and press the "Submit" button.
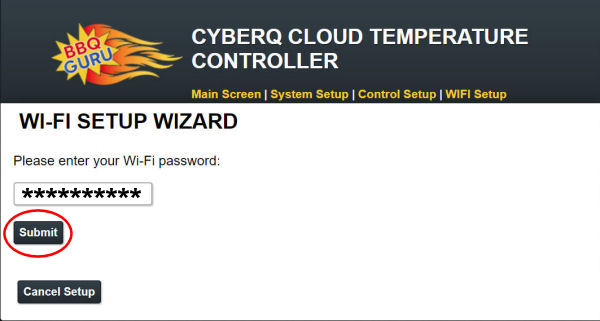 Your CyberQ Cloud will now disconnect from your laptop, desktop, phone, etc., reboot, and then connect to your network. Your laptop, desktop or phone may automatically reconnect to your network, otherwise you will need to reconnect manually.
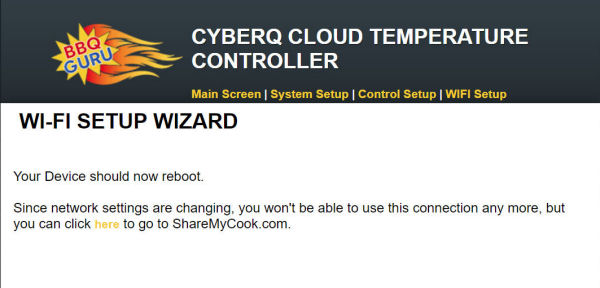 Now your CyberQ Cloud is connected to your network and it has switched from Hot-Spot mode to "Infrastructure" mode. Infrastructure mode simply means that the CyberQ Cloud is no longer creating its own little network, but instead has simply connected to your network.
Now you need to add your CyberQ Cloud device to sharemycook.com. Go to the Share My Cook Dashboard and click on the "Add A Device" button: 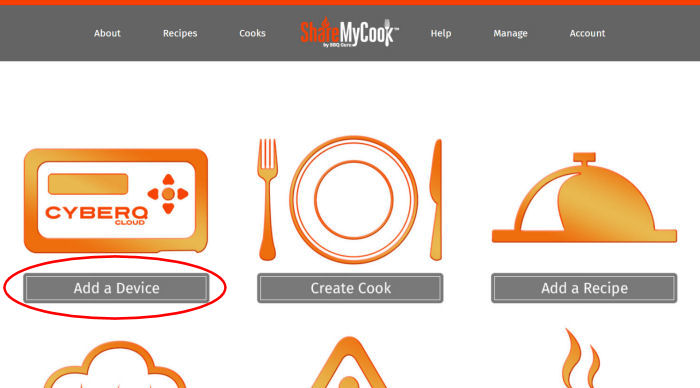 You will be taken to this screen where you are asked to generate a Pin. Click on the "Generate Pin" button.
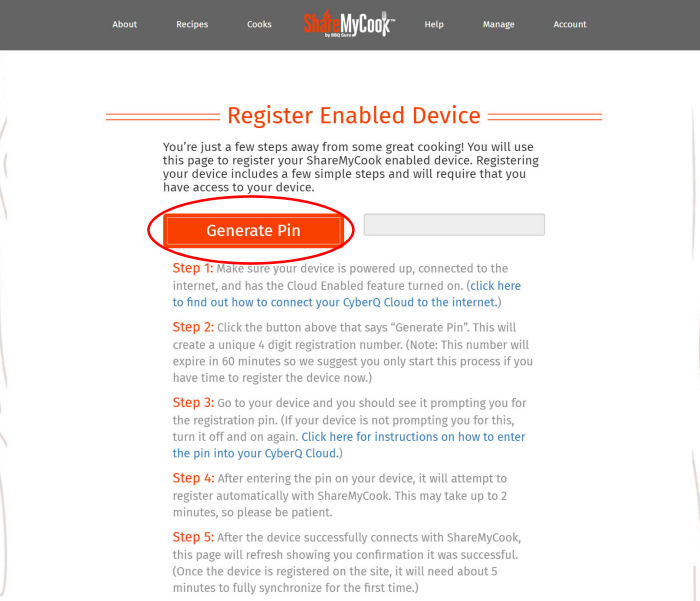 A four-digit Pin will appear in the gray box and your CyberQ Cloud will prompt you to enter it:
 Your CyberQ Cloud will check the Pin with Share My Cook:
 Your CyberQ Cloud will register success:
 Share My Cook will then let you know that it too has registered success. You are now ready to start using the Share My Cook website to monitor and control your CyberQ Cloud device from anywhere you have internet access.
 |
You can support this website by shopping at The Naked Whiz Website Store and Amazon.com
|