 |
 |

There are a number of features and functions available to owners of CyberQ Cloud controllers at www.ShareMyCook.com. We'll show you some of the basic features here, but feel free to go explore on your own as anyone can create an account. When you sign on to the Share My Cook website, you will first be taken to the Share My Cook Dashboard. Click on the "Manage Device" button to be taken to the Dashboard.  This screen is the Share My Cook Dashboard and is displaying the "Current Status" tab. This is probably the screen you will use most since, as its name implies, it shows the current status of your CyberQ Cloud controller. Here you can monitor the temperature of all the probes, the current status of the timer and the current blower output value. You can also set temperature alarms for each probe and you can set a new timer. Finally, off to the right you can view a little progress indicator on where the current temperature of each probe lies in relation to the target temperature. 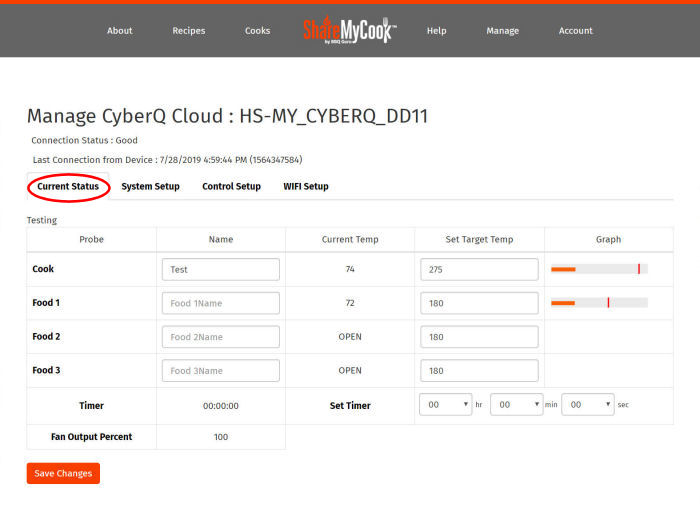 This next screen shows the "System Setup" tab. On this screen you can set your temperature units, menu scrolling option, LCD display backlight and contrast settings, alarm beeps, and key beeps. You can also restore your CyberQ Cloud to its original factory settings.  Next we have the "Control Setup" tab. Here you can specify a cook hold temperature, the timeout action for when the timer expires, the range of temperatures outside of which the alarm will sound, turn Ramp Mode on or off, turn Open Lid Detect on or off, and set the algorithm parameters Cycle Time and Prop Band if necessary.  The final tab on the Dashboard is the "Wifi Setup" tab. Here you can alter all the WiFi parameters for both Hotspot Mode and Infrastructure Mode. Hopefully, you will never need to use this screen as the Cloud Connection Wizard should have gotten you connected to your network without doing any manual twiddling. The only parameter on this screen that we think you might wish to change is the "EMAIL/SMS Alert interval" value. This parameter specifies the number of minutes between status updates that can be sent to your via email or text. Setting it to "0" disables these updates.  Clicking on the "ShareMyCook" icon at the top of each page will return you to the Dashboard.  By clicking on the "Create Cook" button, you can create a cook, where you can record all sorts of information about any of your cooks. 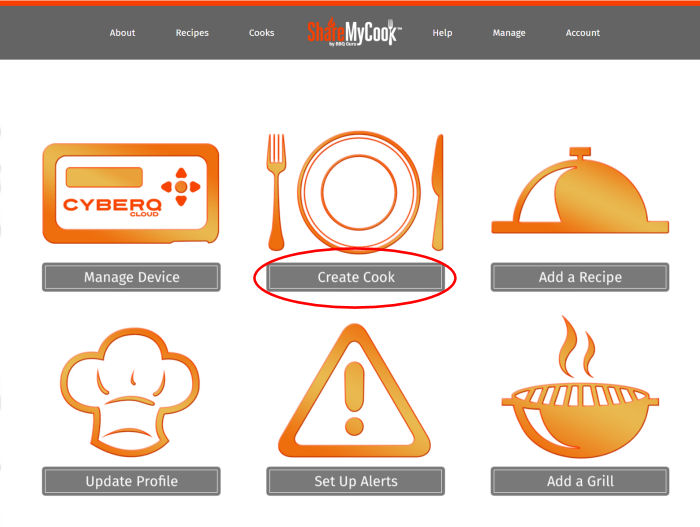 Just fill in all the information you wish, and then you can either click on the "Save" button or the "Save and Start Recording" button. Saving a cook, does just that. It saves the cook and it can then be found on the Cooks page. Save and Start Recording also saves the cook, but also starts recording the data from your CyberQ Cloud. In either case, you will be taken to a list of your cooks once you save a cook. (You can always get back to the list of your cooks by clicking on the "Manage" link at the top of every page, and selecting "My Cooks".) 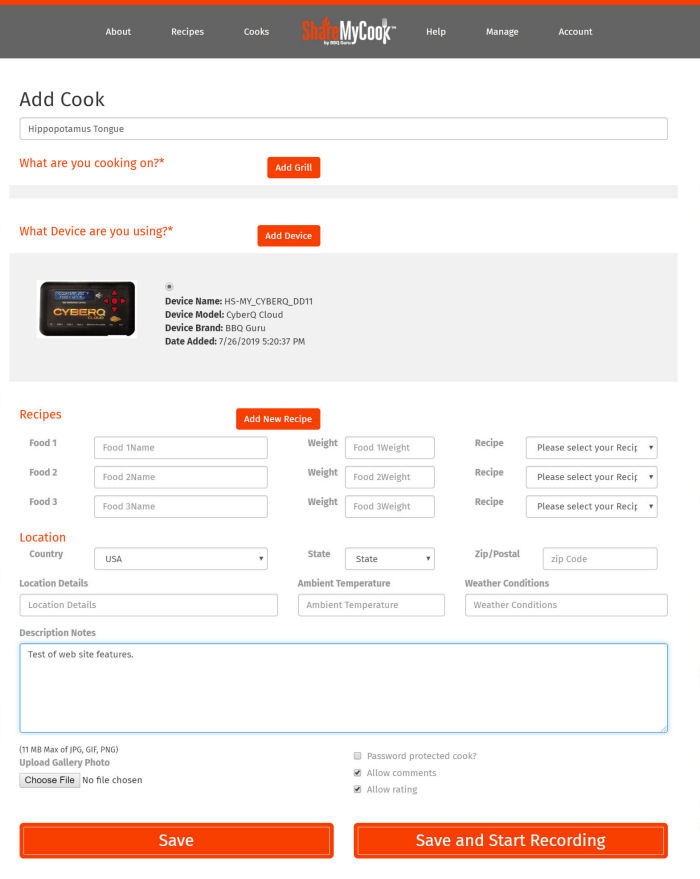 Once on the list of your cooks, you will find a list of all the cooks you have saved. For any particular cook you can edit the information you previously had submitted for the cook and start and stop recording the data from your CyberQ Cloud device related to this cook. Also, by clicking on the "View Cook" button, you can view the status of the cook, either realtime or afterwards. 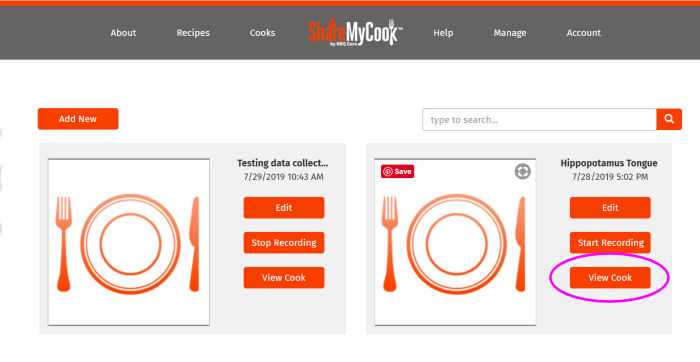 And this is what it looks like when you view a cook realtime. You have the various temperatures displayed along with a graph of the temperatures over time. 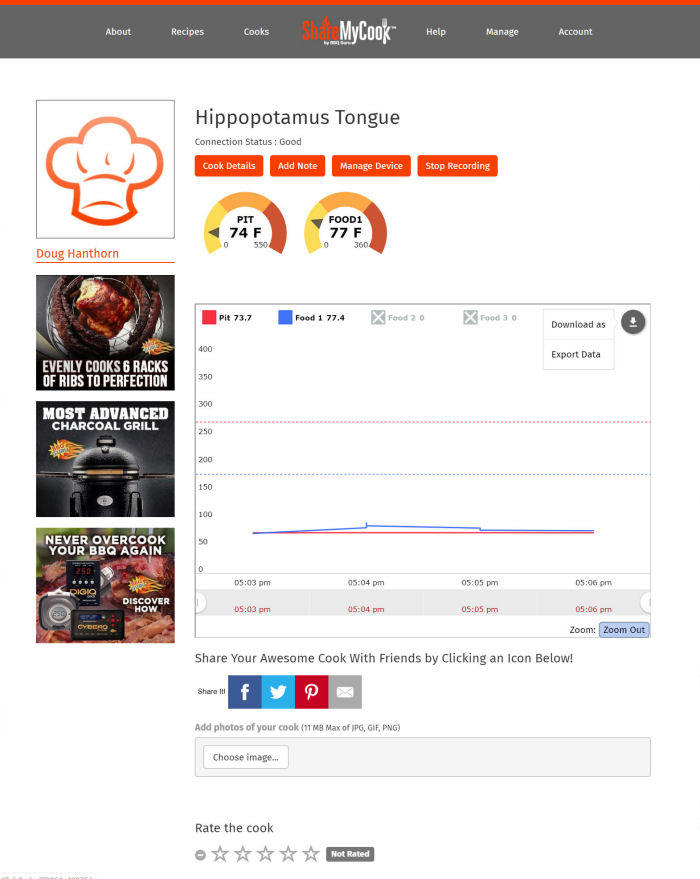 One last feature we will point out is that you can download the graph and the underlying data. The image of the graph can be saved as PNG, JPG, SVG or PDF files. The raw data can be exported either as a CSV or JSON file. 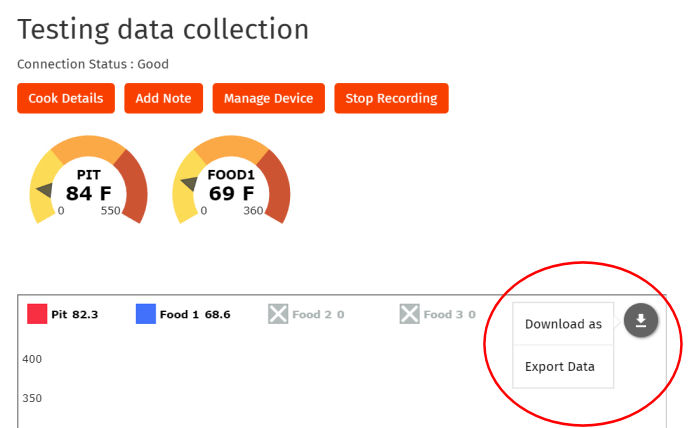 Those are the basic features provided by the web site. There are loads more that we won't go into here, but here's a list of some of the additional features available:
There is no App for the CyberQ Cloud device.
You can use any Amazon Alexa-enabled device to use voice commands to control and monitor your CyberQ Cloud controller. Simply use commands/ask questions like "Alexa, tell CyberQ Cloud, set the pit temperature to 250" or "Alexa, ask CyberQ Cloud, what's the temperature of Food 1?" Alexa will interface with the Share My Cook website to respond. The procedure for setting up Alexa to do this is quite simple, so we won't show you how to do it here, but BBQ Guru has a Knowledgebase article on how to do it. Here are a few observations about using Alexa to work with your CyberQ Cloud device:
Frankly, we don't see much value in using Alexa for this, but then again, you can purchase a refurbished second generation Echo Dot from Amazon for about $25, so if you are curious, it doesn't take a large investment to get started.
All Contents ©2001, 2023 The Naked Whiz International Association of Fire Safety Science member #1604 You can support this website by shopping at The Naked Whiz Website Store and Amazon.com
|