Using The DynaQ In Manual Mode
There is no manual mode on the DynaQ since there is no temperature display. All interactions have to be done via the BBQ Guru App.
The good news, though, is that unlike some other controllers that have no display and have no manual mode, the DynaQ only
needs a Bluetooth connection with your smart device, as there is no Wi-Fi and no cloud interaction required.
Connecting To The DynaQ With Bluetooth
You can connect your DynaQ to iOS and Android devices via Bluetooth. You can then use your smart device to control
your DynaQ over typical Bluetooth distances. So the first thing you need to do is to connect your DynaQ to a smart device using
Bluetooth. It's simple and we'll show you now how simple.
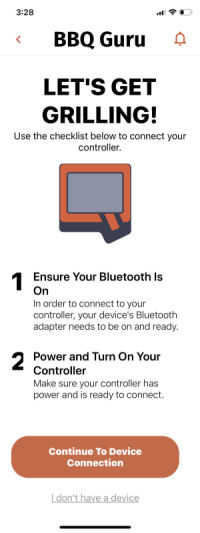
Start up the BBQ Guru App and you will see this screen. Scroll down to tap on the "Continue To Device Connection" button. |
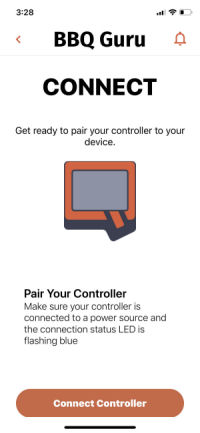
That will take you to this screen. Tap on the "Connect Controller" button. |
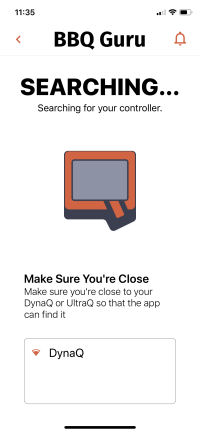
The App will scan and then display this screen once it finds your DynaQ. Tap on the DynaQ name. |
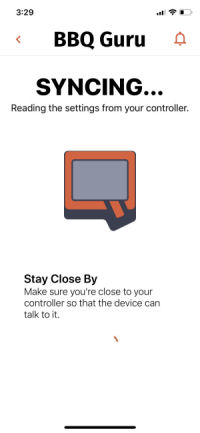
Now the App will synch up with your controller. |
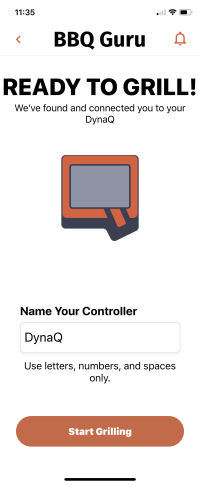
Once synching is complete you will be given the chance to name your controller. After you decide on a name, tap the "Start Grilling" button. |

You may see the App download any new level of firmware that might be available. |
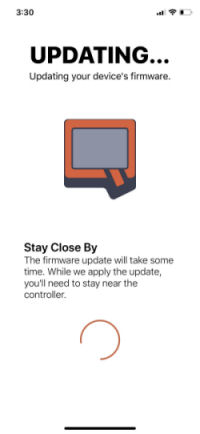
If a new level of firmware was downloaded, the App will then install it. |
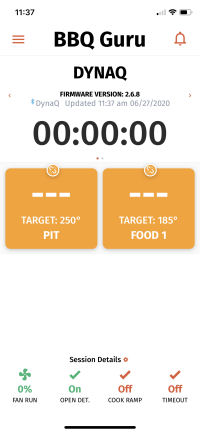
Finally, you will see the BBQ Guru App Grilling Dashboard that shows the status of your unit and allows you to control it. |
Bluetooth Range
We probably all know that the advertised range for Bluetooth is 10 meters, or 33 feet. We also probably all know that this
depends on a lot of things. We did a couple of quick tests and found that under ideal conditions, i.e. line of sight with
no obstructions, we were able to keep a Bluetooth connection between our iPhone and the DynaQ up to 150 feet away. Also, we
found that on our back deck, we could keep a connection going 39 feet away, but if we moved around the corner of the house,
the connection immediately dropped. So, your mileage may vary.
The BBQ Guru App
This is the first time that BBQ Guru has come out with an App to support a wireless temperature controller.
We gave you a brief taste of the BBQ Guru App in the previous section, so now let's move on and take a look at
the main features of the App.
So let's start off by looking at the BBQ Guru App's Grilling Dashboard:
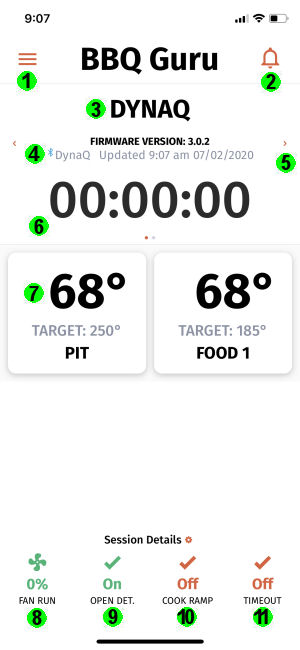 |
- Menu - Tap the three horizontal lines to display the menu.
- Alarm Indicator - A solid bell indicates there is an alarm pending.
- Device Name - The name of your device is displayed here.
- Firmware Status - The firmware version is displayed here on the first line, along with
either a Bluetooth or no connection icon, and the last time that
the display was updated on the second line.
- Scroll Devices - If you have more than one device, you can swipe left or right to scroll left or right between them.
- Timer - The time remaining on any timer you have set will display here.
- Probe Status - Each of the two boxes shown will display information about one of your probes. It contains the current temperature, the target temperature and the probe name. You can tap on any of the squares to go to a screen that shows more information about that probe.
- Blower Indicator - This icon shows if the blower is plugged in and its current duty cycle.
- Open Lid Detect - This shows if Open Lid Detect is on or off. You can tap it to be taken to the controller settings screen to change it.
- Ramp Mode - This shows if Ramp Mode is on or off. You can tap it to be taken to the Ramp Mode screen where you can turn it on and off, and change the target ramp temperature.
- Timeout Indicator - This shows if you have a timer set. You can tap it to be taken to the Timeout screen where you can set a value and an action to take when the timer expires.
|
Now, let's look at the other areas of the BBQ Guru App. These following screens are available from the
main menu accessed by clicking on the horizontal lines ( ) in the upper left corner of the screen. ) in the upper left corner of the screen.
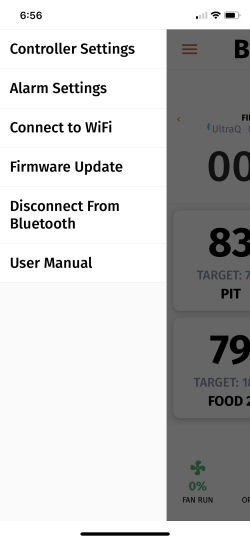
This is Main Menu screen. Tapping on the
three horizontal lines in the top left of the screen opens this menu. You can then tap on individual items to go
to those screens.
 |
This is the Controller Settings screen. Here
you can name your device, choose your temperature units, turn the controller LEDs on or off, turn Open Lid Detect
on or off, choose your Smart Cook Settings, and restore the unit to factory settings.
 |
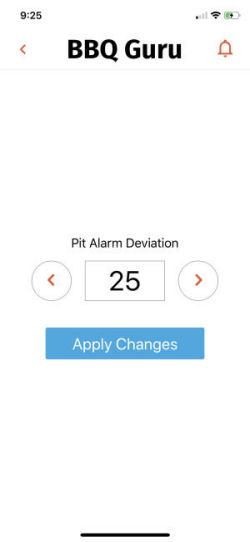
This is the Alarm Settings screen. Here you
can set the Pit Alarm Deviation (how high the pit temperature can go above the target temperature before the alarm sounds).
 |
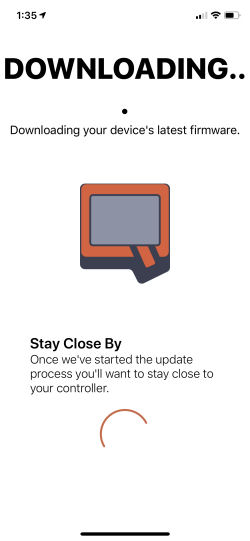
This is the Firmware Update screen. You can choose this item at
any time in order to check to see if there is a new level of firmware available. If there is, it will
download automatically.
 |
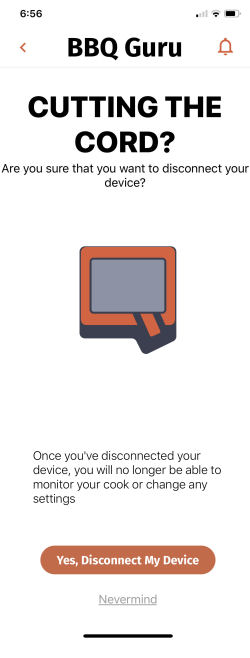
This is the Disconnect From Bluetooth screen. If you are having
trouble connecting your smart device to the DynaQ's Bluetooth, you may need to use this item to
disconnect from Bluetooth and then add the controller back to the App in order to reconnect.
 |
Now let's look at the other screens available to you on the BBQ Guru App:
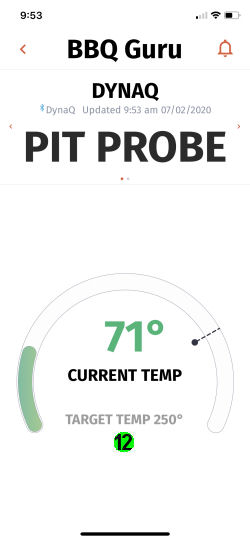
 This is the Pit Probe screen. You get here
by tapping on the pit probe square block on the home screen. It shows you the name of the probe, the current temperature
reading and the current target temperature. Tapping on the target temperature ( This is the Pit Probe screen. You get here
by tapping on the pit probe square block on the home screen. It shows you the name of the probe, the current temperature
reading and the current target temperature. Tapping on the target temperature ( )
will open the next screen where you can set the target temperature. )
will open the next screen where you can set the target temperature.
 |
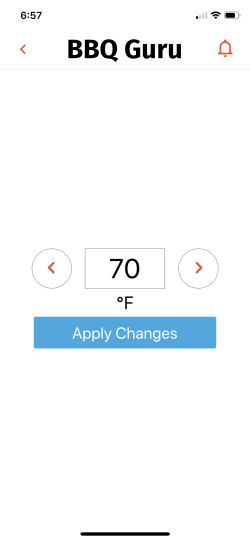
This is the Pit Target Temperature screen.
Here you can set a target temperature for your cooker. You can either tap on the "<" and ">" signs to adjust
the temperature, or tap on the temperature block and enter a new temperature from the keyboard.
 |
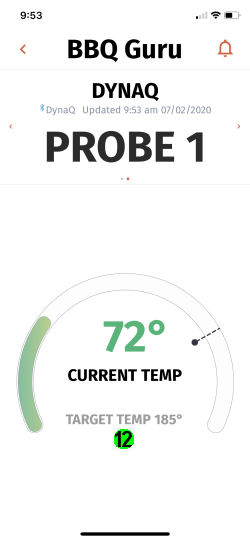
This is a Food Probe screen. You get here
by tapping the food probe square block on the home screen. It shows you the name of the probe, the current temperature
reading and the current target temperature. Tapping on the target temperature ()
will open the next screen where you can set the target temperature or toggle Ramp Mode on or off.
 |
| x | | |
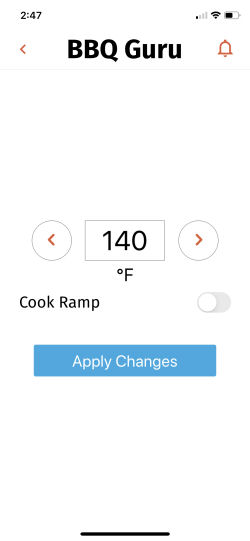
This is the Food Target Temperature screen.
Here you can set a target temperature for the food probe. You can either tap on the "<" and ">" signs to adjust
the temperature, or tap on the temperature block and enter a new temperature from the keyboard. You can also turn Ramp Mode
on or off for this food probe.
 |
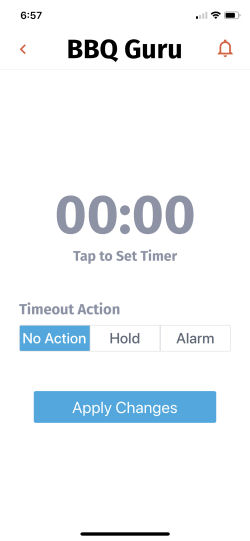
  This is the Timeout screen.
You get here by either tapping on the timer value on the home screen () or by tapping
on the Timeout icon at the lower right of the home screen () This is the Timeout screen.
You get here by either tapping on the timer value on the home screen () or by tapping
on the Timeout icon at the lower right of the home screen ()
 |
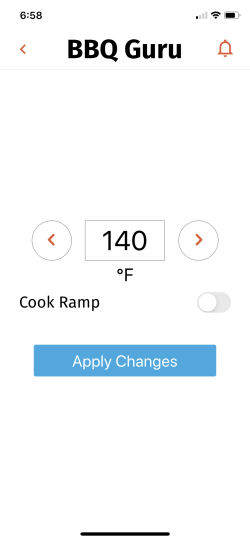
 This is also the Food Probe screen. You can
open this screen by tapping on the Cook Ramp icon at the bottom of the home screen().
Here you can turn Ramp Mode for the
Food probe on and off,
as well as specify the target temperature for the Food probe. This is also the Food Probe screen. You can
open this screen by tapping on the Cook Ramp icon at the bottom of the home screen().
Here you can turn Ramp Mode for the
Food probe on and off,
as well as specify the target temperature for the Food probe.
 |
|