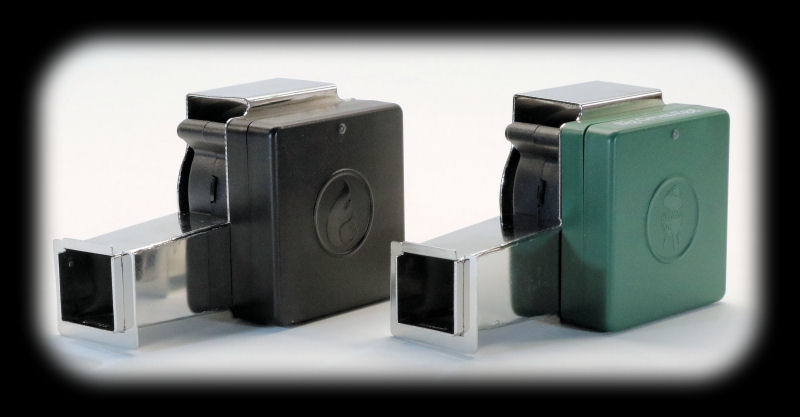
WiFi Setup and Operation
Since the Flame Boss 400 and EGG Genius controllers have no display or keypad, all interaction must be done by using the Flame Boss and EGG Genius
Apps, or by using the web page access provided by www.myflameboss.com. The first
thing you should do (if you haven't done this already) is to create an account at Flame Boss, which you can do via the App or the web page.
Once you do this, you can then use the App interface on your smart device to connect your controller to your local network and the Flame Boss servers.
It is probably worth explaining before we set up the Flame Boss 400 or EGG Genius that they have two WiFi modes:
Access Point Mode: In Access Point mode, the controller creates a small network and begins broadcasting
its network ID over WiFi. Other devices can then see this network and connect to it. This is how your
smart device will initially connect directly to the controller so that you can set it up. Your controller
will be in Access Point mode when you get it, which is indicated by the LED slowly blinking.
Station Mode: When in Station Mode, your controller is just like any other WiFi device (such as a printer or
a laptop or a phone) in that it can see what networks are available and then join them to communicate with them. Once
you set up your controller, it will switch from Access Point mode to Station mode, which is indicated by the solid LED.
Your controller should remain in Station mode from then on. If you should ever need to set up your controller again, you
can return it to Access Point mode by pressing the reset button for one second. You can also do a factory reset in addition
to putting the controller into Access Point mode by pressing the reset button for five seconds.
So let's set up a controller and get it talking to the Flame Boss servers. The process is virtually identical between the
two units, so we'll just show you setting up the EGG Genius controller.
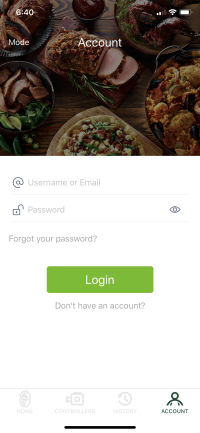
1. First of all start up the EGG Genius App your phone. You will see the following screen. Either Login or create an account: |
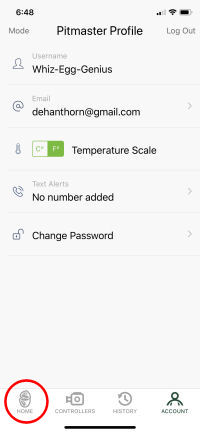
2. Once you are logged into your account you will see the following screen. Click on the Home icon. (If you just created your account and the Home icon is dimmed, logoff and log back in.) |
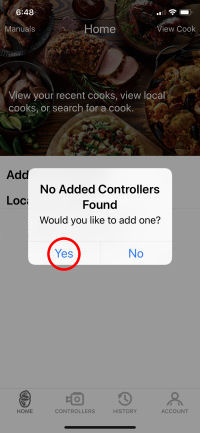
3. When you get to the home screen, this will pop up. Click on Yes to add a controller. |
 |
 |
 |
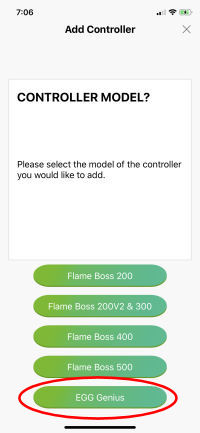
4. Select the controller type you wish to set up. In this case, we selected EGG Genius: |
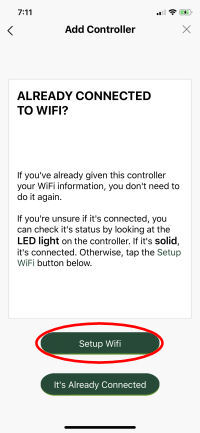
5. Since we haven't set up WiFi on our controller yet, we selected Setup WiFi; |
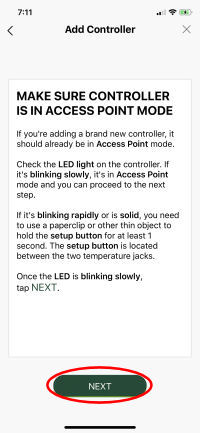
6. Next the App prompts you to ensure the controller is in Access Point mode (LED slow blinking). Click on Next: |
 |
 |
 |
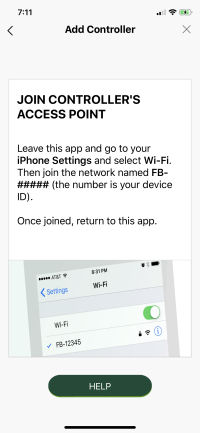
7. Now it is time to bring up your device's Settings App and tell the device to join the EGG Genius network. Open the Settings App, leaving the EGG Genius App running. |
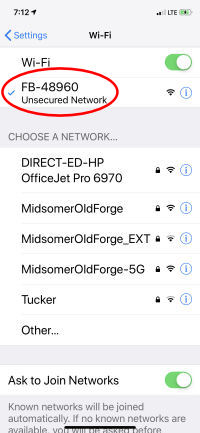
8. In your Settings WiFi section, you will see a new network FB-xxxxx, where xxxxx is a five-digit number. Join that network: |
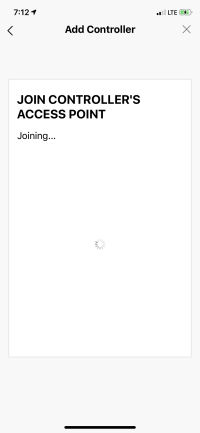
9. Return to the EGG Genius App and you will see it trying to join the EGG Genius Access Point: |
 |
 |
 |
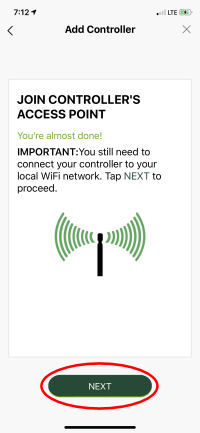
10. Eventually, the App should report that it has successfully joined the EGG Genius network. Click on NEXT: |
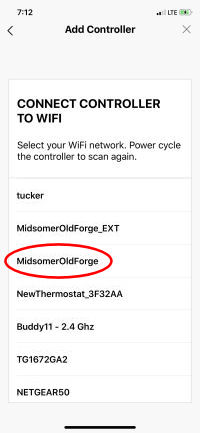
11. Now you need to tell the EGG Genius App the name of your network. Select the network you will be connecting to: |
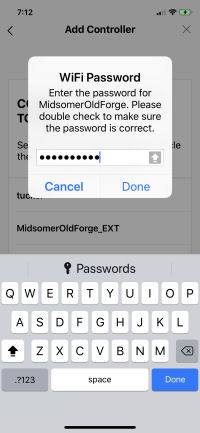
12. Enter the password to connect to your network: |
 |
 |
 |
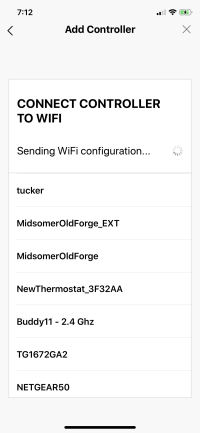
13. You may see the following screen showing that the WiFi configuration information is being sent to the EGG Genius: |
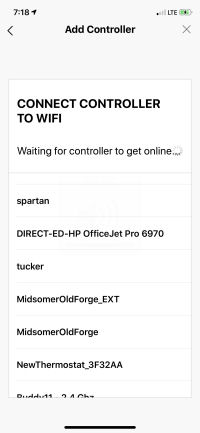
14. You should then see the following screen indicating that the EGG Genius is connecting to the network and that the App is waiting for it to connect: |
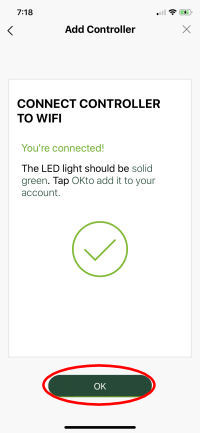
15. The following screen will appear once the EGG Genius controller has connected. Click on OK and you are done! |
 |
 |
 |
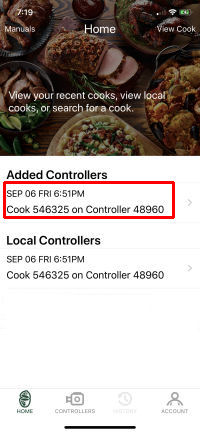
16. You will be returned to the Home screen and your controller will now appear. Click on the controller in the list of Added Controllers: |
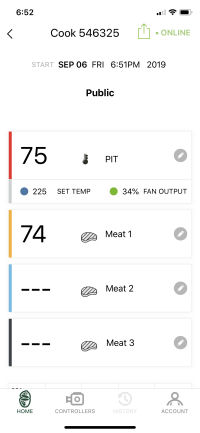
17. You are now at the screen that will show your controller's status: |
 |
 |
Notes on WiFi operation: Here is some further information on using the WiFi function of you Flame Boss 400 and EGG Genius controllers.
- Once you reach step 15 above in the process for connecting your controller to the network and the Flame Boss servers, your controller will check to see
if it needs a firmware update. If so, it will update itself and you will get a notification on your device letting you know that it has completed. There
is no other indication that the firmware update is in progress.
- Once your controller is set up, when you power it on, the LED will flash quickly showing that it is trying to connect to your network. Eventually, it
should stop blinking and stay on once it has connected.
- If you should ever find your controller's LED blinking slowly, that means it is in Access Point mode. This is normal when you first
get your controller or if you have gone through the procedure to connect it directly to your smart device (see WiFi Connect Modes
below). If you find the LED slowly blinking for no apparent reason, you can try pressing the Reset button for 1 second to switch it
to Station mode. If your controller still doesn't connect to your network, you will probably need to set
it up again.
WiFi Connect Modes
Flame Boss has added (since we reviewed the Flame Boss 300) the ability to connect your smart device to your controller via WiFi
in the following three modes:
Cloud Connect: Your phone will connect to the Flame Boss server over the internet and you can view
and manage any of your connected controllers. This mode has the most functionallity including cook history and cook notes.
If both your phone and controller have internet access, use this mode.
When in Cloud Connect mode, your home screen will show "Added Controllers" and "Local Controllers." Since your smart device
has access to your history data, both Added and Local controllers will show the last cook for each controller that you have
connected to the Flame Boss cloud. Your cook screen will show the word "Public" at the top.
Local Connect: Your phone will detect any controllers on your local WiFi network. You can then
connect to your controllers to view and manage them. History and Account pages are disabled for this mode. If you have a router
with no internet access, use this mode.
When in Local Connect Mode, your smart device does not have access to any history data so your home screen will show only
"Local Controllers" and only controllers that are currently active on your local network. Your cook screen will show the
word "Local" at the top.
Direct Connect: Your phone will connect directly to your controller so you can view and manage it.
Using this mode requires the controller to be in Access Point mode. History and Account pages are disabled for this mode. If you
don't have a router, use this mode.
When in Direct Connect mode, your Home screen will show "Connected Controller" and only the controller to which you are directly
connected. Your Cook screen will have the word "Direct" at the top. Also note that the LED on your controller will be on
solid when you are directly connected.
Switching back and forth between Cloud Connect Mode and Local Connect Mode is pretty simple. Just go to the Account screen
in the App and press the Mode button. This will open a little popup that allows you to specify the mode. We did notice that
when switching from Local Mode back to Cloud Mode, the App was occasionally unable to access the controller. A quick power
off/on of the controller resolved this.
Switching between Cloud or Local Connect and Direct Connect mode is a bit more involved. As stated above, you would only want to
do this if there were no local network to connect to. Since it is more involved and some of the steps might not be so obvious,
we have provided step by step instructions for switching.
To switch from Cloud Connect mode to Direct Connect mode:
- Go to the Account page in the App.
- Tap the Mode button in the top left corner.
- When you get the popup window, select Direct Connect mode.
- When you are asked which device, select your controller. The App will tell you to ensure the controller is in
Access Point mode.
- Using a paper clip, press the reset button on your controller for 1 second. The LED on your controller should
start slowly blinking, showing it is in Access Point mode.
- Tap the Next button on the App.
- Go to your smart device's settings page, and connect its WiFi to the Flame Boss controller's network, named "FB-xxxxx",
where "xxxxx" is a five-digit number.
- Return to the App which will then join the Flame Boss network. Once it shows that it has successfully joined the network,
you will then be in Direct Connect mode.
To switch back to Cloud Connect mode:
- Go to the Account page in the App.
- Tap on the Mode button in the top left corner.
- When you get the popup window, select Cloud Connect mode.
- Go to your smart device's settings page and switch its WiFi from the Flame Boss network to your local network.
- Using a paper clip, press the reset button on your controlle for 1 second.
- Go to the Home page in the App, select your controller, and it should now be online in Cloud Connect mode.
|


