|
|

The App
The Inkbird system is not only enhanced with the use of its App, it's mandatory to use the probe and Case. Here are the more important screens:
 1. When you first start the App, you briefly get this splash screen. |
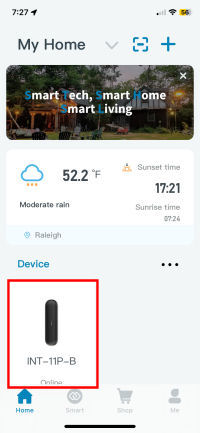 2. After a few seconds, up pops the "My Home" screen which lists all the devices you have paired with your phone. Tap on the device to proceed. |
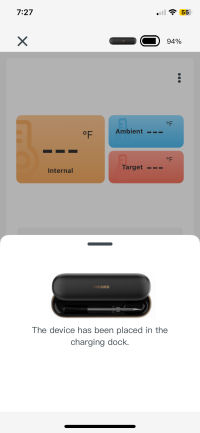 3. If your probe is still in the Case, you will get this pop-up letting you know. Tap anywhere on the screen to get rid of the pop-up. |
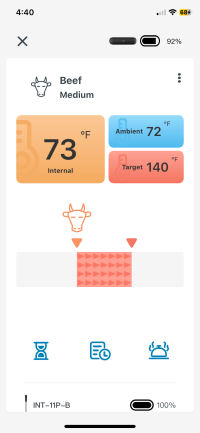
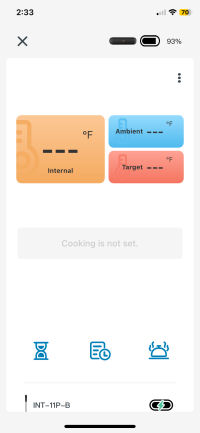 4. You will then get what we are calling the Probe screen. |
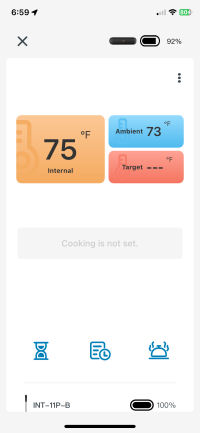
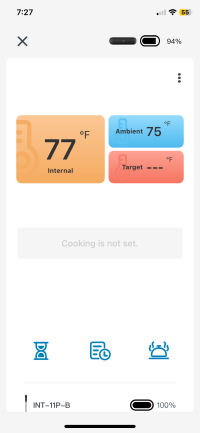 5. When you remove the probe from the case, you start to get readings. |
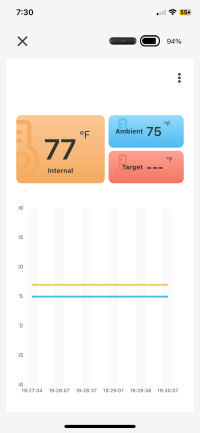 6. If you scroll down the screen, you will find a graph of the temperature values. |
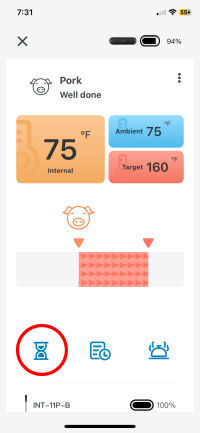 7. If you set up a cook, this is what the probe screen will look like. We show you all the details down below. Tap on the hour glass icon to set a timer. |
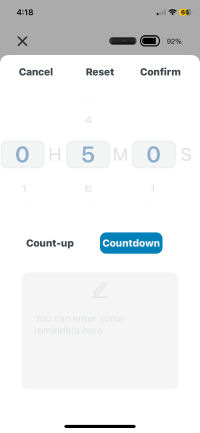 8. Here you can set either a count down or count up timer. |
 |
NUGGET ALERT: You must leave the App active if you want to receive alarms during your cook. |
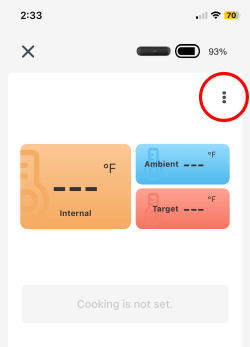
So let's now breakdown the detailed probe screen during a cook:
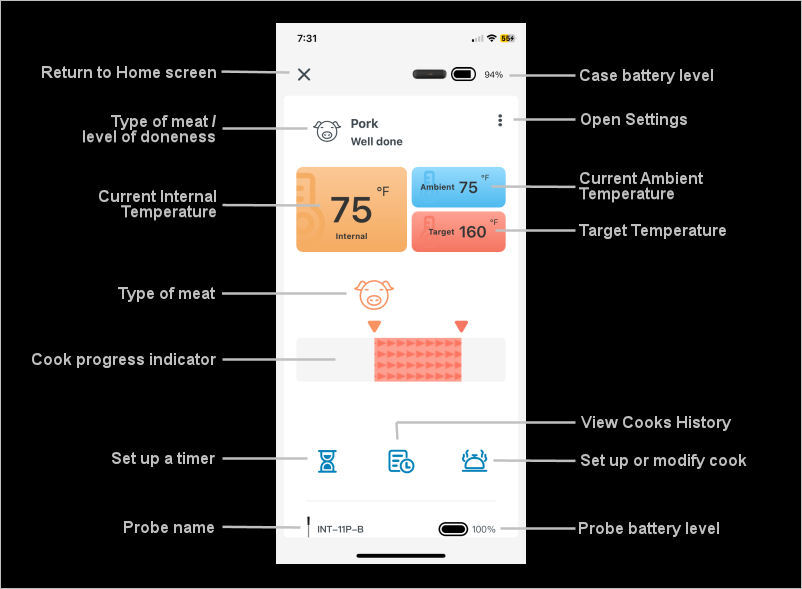
The Probe View
And now let's take a look at a list of all the things that you change via the settings screen. To access the settings screen, simply tap on the three dots in the upper right hand corner of the Probe screen:
 |
|
Finally, here is a list of all the types of meat (and the associated default target temperatures) that are supported for cooking in the App:
|
|
|
|
Managing Cooks Via The App
Setting up a cook on the Inkbird App is pretty simple, so let us briefly show you how.
Setting Up A Cook: When you set up a cook, you select a meat and target temperature:
 1. Start off from the probe screen by tapping on the Cook icon. |
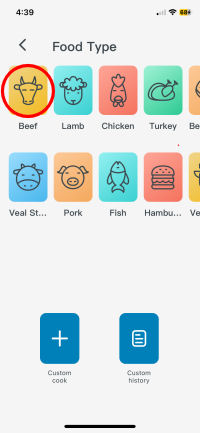 2. Tap on the food type you'll be cooking. We'll select Beef. |
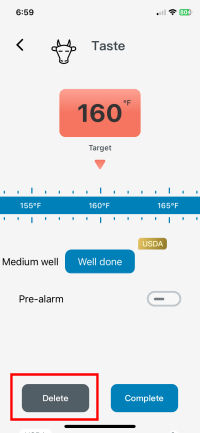
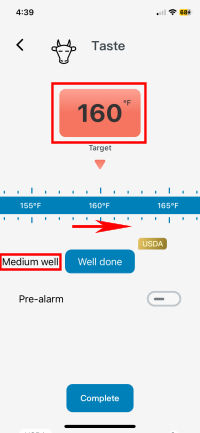 3. You can set the target temp by tapping on the target to enter a number, tapping on the button for the level of doneness you want, or by sliding the temperature bar left or right. |
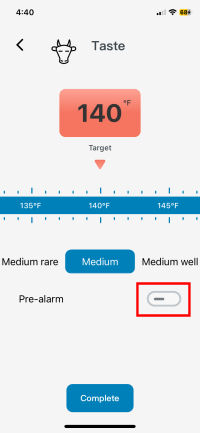 4. We tapped on "Medium" and now the target is 140°F. To enable a pre-alarm, tap on the little slider button. |
 5. Tap on the number of degrees below your target that you want to trigger an alarm, then tap on "Complete". |
 6. You are returned to the probe screen with your cook all set up. |
Editing A Cook: Once you have a cook started, you may then edit it, which consists of simply changing the target temperature. We'll change our target from 140°F to 130°F):
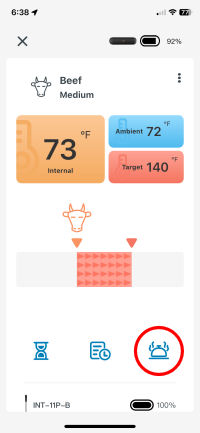 1. From the probe screen, tap on the cooking icon. |
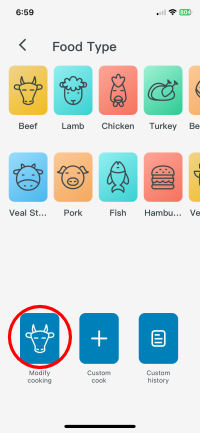
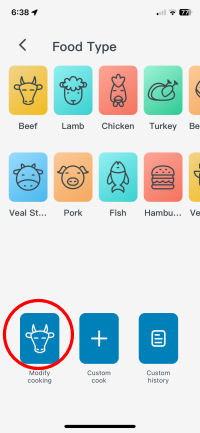 2. Tap on the "Modify Cooking" button. |
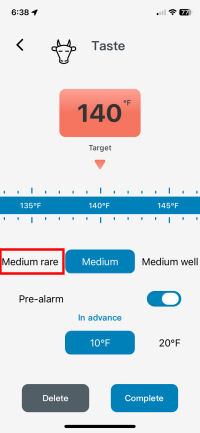 3. Change the temperature as you see fit. We tapped on "Medium rare". You can also modify the Pre-alarm. |
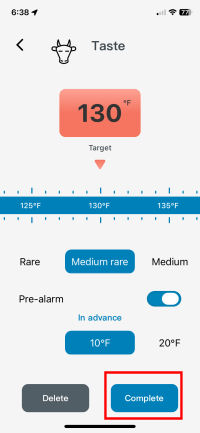 4. The target temperature has changed to 130°F. Tap on "Complete". |
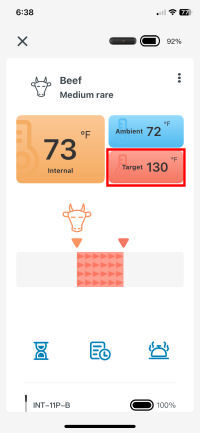 5. You are returned to the probe screen with the new target temperature. |
Stopping A Cook: There are two ways that cooks can be stopped, depending on whether or not you want the cook to be recorded in the Cook History. To just simply give up and quit out of a cook with nothing recorded in the cook history:
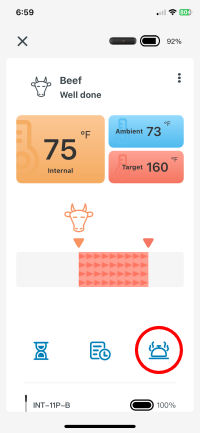 1. From the probe screen, tap on the cooking icon. |
 2. Tap on the "Modify cooking" icon. |
 3. Tap on the "Delete" button. |
 4. You are now back at the probe screen and the cook is gone. No entry for the cook will be made in the cook history. |
As far as we can tell, there is no way to manually stop a cook and have the cook recorded in the cook history. For that to happen, the probe's internal temperature has to reach the target temperature. However, we can simulate this in order to show what happens by setting a very low target temperature. When the internal temperature reaches the target temperature, the alarm goes off and this happens:
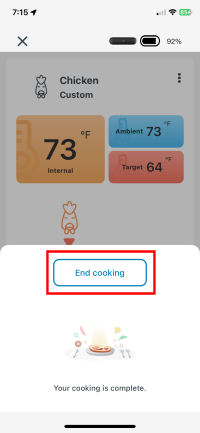 5. When the target temperature is reached, the alarm goes off and this alert pops up. Tap on "End cooking" to formally end the cook. |
 6. The pop-up disappears. To see the cook in your cook history, tap on the cook history icon. |
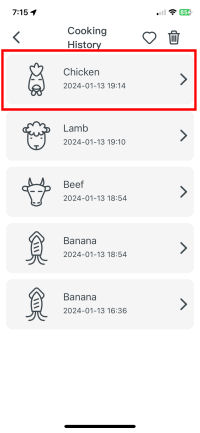 7. Tap on the cook you wish to view. |
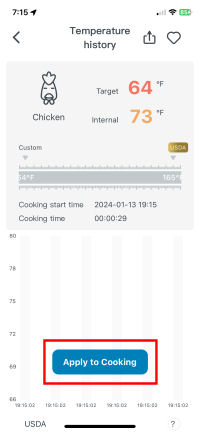 8. The cook is then displayed. Notice the "Apply to Cooking" button. If you tap on this, a brand new cook is started with the same food and target temperature already set for you. |
Recording A Cook: All cooks are automatically recorded and graphed. You can't see the raw data, but you do get the graph. This is what the graph looks like during a cook. As you can see, parts of the graph disappear halfway through the cook:
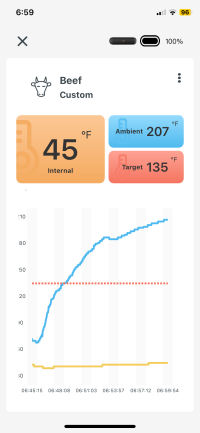 1. This is what the graph looks like 13 minutes into the cook. |
 2. At 40 minutes into the cook, the graph still looks ok. |
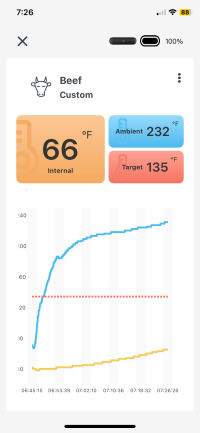
 3. At 1:07 into the cook, the first 17 minutes of the graph have disappeared. So has the line showing your target temperature. |
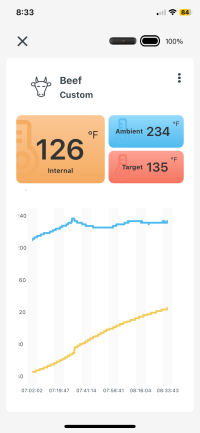 4. Here is the graph shortly before the cook ended. |
And here is what happens when your cook ends. When the internal temperature reaches the target temperature, you get a pop-up telling you that your cooking is complete. When you tap on "End cooking", the cook is entered into the history and you can view a complete graph:
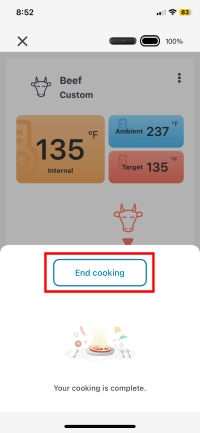 5. You get this pop-up (and some beeping) when the internal temperature reaches the target temperature. Tap on "End cooking" to end the cook and silence the alarm. |
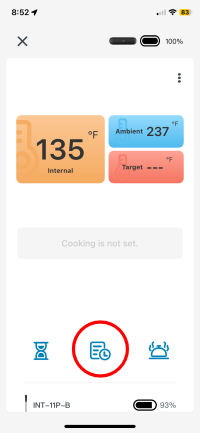 6. You are returned to the probe screen. If you wish to see your cook in the history, tap on the history icon. |
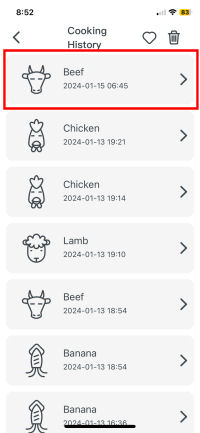 7. A list of past cooks appears. Our beef cook is at the top of the list. Tap on it to see the cook. |
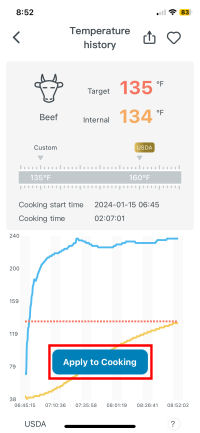 8. Here's the complete graph and some information about your cook. |
Notice the "Apply to cooking" button on the screen showing our beef cook. If you pull up any cook in your history and wish to repeat it, meaning to do another cook with the same type of meat and the same target temperature, tap on the "Apply to cooking" button. A new cook will start.
Alarms
Using the App, you can request an alarm to go off when the meat reaches the target temperature. You can
also set a pre-alarm to go off a certain number of degrees before you reach your target temperature. Alarms
can be cancelled in the App or by pressing the button on the Case.
Updating The Firmware
Unlike many of these truly wireless thermometers, the Inkbird
You can support this website by shopping at The Naked Whiz Website Store and Amazon.com
|