|
|
Setting Up The WiFi Bridge
Setting up the WiFi Bridge is pretty simple and we bet you have done this exact sort of thing with
other cloud-enabled devices. The App connects to the device, you enter your WiFi information into the
App, the App sends it to the device and then the device connects to your network. Here's how it
goes in painful detail:
 Step 1. The first thing you will see when you power on the WiFi Bridge is this "Booting" screen. It will take almost a minute for the unit to boot. |
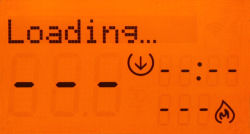 Step 2. After the unit boots, it will display this "Loading" screen for about 45 seconds. |
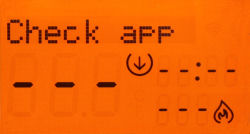 Step 3. Once the unit has finished loading, it will display this "Check app" screen. Now you start the App on your smart device. |
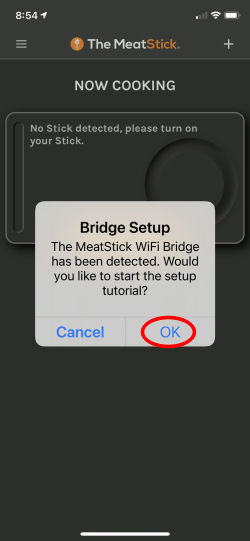 Step 4. The App should show you this popup indicating that it has detected the WiFi Bridge. Click on "OK". |
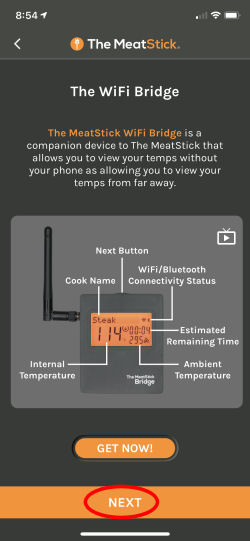 Step 5. The App will show you this screen describing the WiFi Bridge. Just click on "Next". | 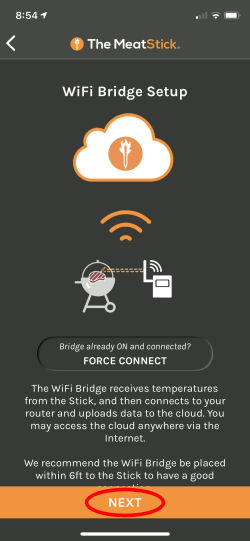 Step 6. Next the App will show you this screen explaining how the WiFi Bridge interfaces between your probe and the Cloud. Just click on "Next". |
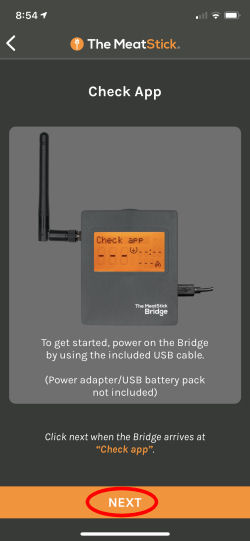 Step 7. The App will now tell you to turn on the WiFi Bridge and wait for it to display "Check app". (We have already done this, of course.) When you see the "Check app" screen click on "Next". |
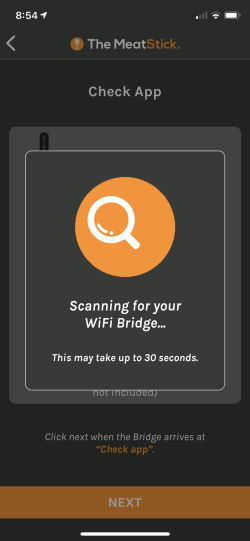 Step 8. The App will now scan for your WiFi Bridge. Just wait for it. |
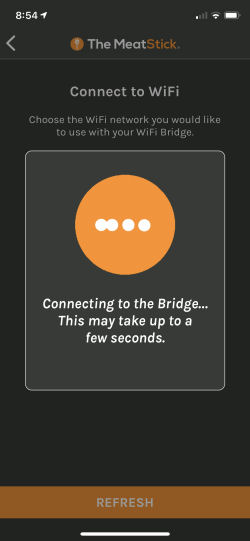 Step 9. Next the App will try to connect to your WiFi Bridge. Again, just wait for it. |
 Step 10. Once the App has connected to the WiFi Bridge, it will ask you to select a network. Make sure to select the same network that your smart device connects to. |
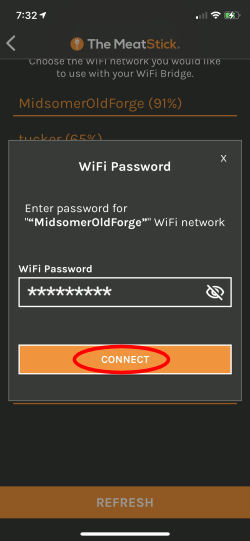 Step 11. The App will prompt you to enter your network password. Do so and click on "Connect". Wait for it. |
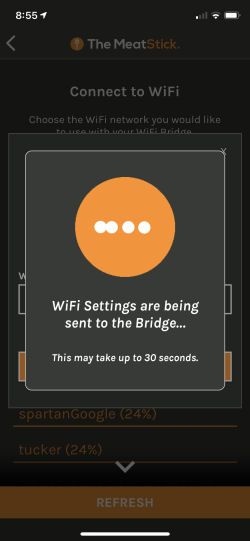 Step 12. Finally, the App will send your settings to the Wifi Bridge. Wait for this to complete. |
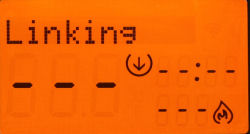 Step 13. Once the App starts sending your settings to the WiFi Bridge, the display on the WiFi Bridge will alternate between this display showing "Linking"..... |
 Step 13a. ......and this display showing the first 9 characters of your network name. They will flash back and forth until the WiFi Bridge has completed its setup. |
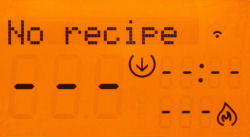 Step 14. Finally, the WiFi Bridge will either display this screen with "No recipe" or if a probe is active, it will show the normal screen with the probe name and temperatures. |
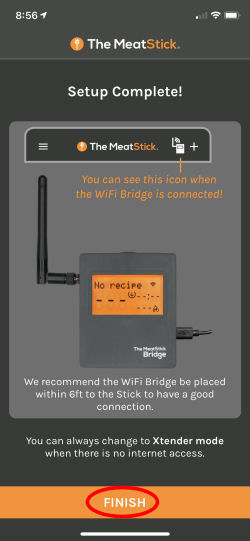 Step 15. Back to the App, once the WiFi Bridge successfully connects to your network, it tells the App that all is well and the App displays this screen. Click on "Finish". |
 Step 16. Once you click on "Finish", the App will return you to the "Now Cooking" screen. Done! |
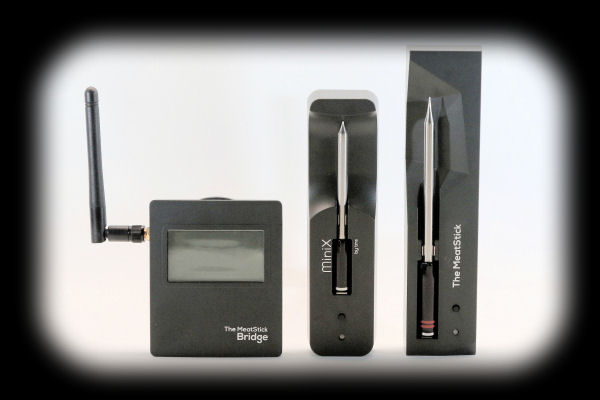
Number of Probes Supported
The MeatStick App can support up to 8 probes simultaneously.
Power
The MeatStick chargers, either with or without the extender function, are powered by 2 AA batteries.
The MeatStick WiFi Bridge is powered by a micro USB cable.
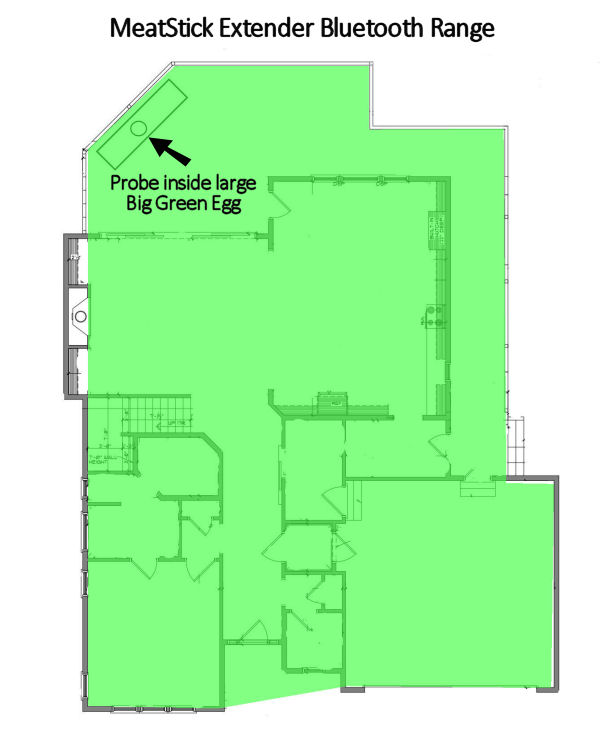
Bluetooth Range
We placed both probes inside a large Big Green Egg cooker.
We tested with the probes in the vertical position. Both probes were able to connect
with nothing between us and the cooker at over 39 feet. (That's the maximum distance we could get while
staying on the deck and not having any obstructions.) So, you should be able to wander around your deck or
backyard and connect to the probe as long as there are no obstructions.
Of course, the more realistic question is whether or not you can stay connected while going inside your house or around the corner of your house. From this test, we produced the following diagram which shows the floorplan of our house and deck, and the location of the cooker. For reference, the distance from the front of the house to the back of the deck is about 70 feet. Here's how the MeatStick Probes did:

As you can see we were able to maintain a connection on the deck as long as we didn't go around the corner of the house. We could also maintain a connection inside in the open area of the family room and kitchen, but not beyond past any more walls.
We repeated our range check throughout our house, but using the MeatStick probes with the Xtender:
Using the Extender, we had coverage throughout the house including the second floor.
You can support this website by shopping at The Naked Whiz Website Store and Amazon.com
|