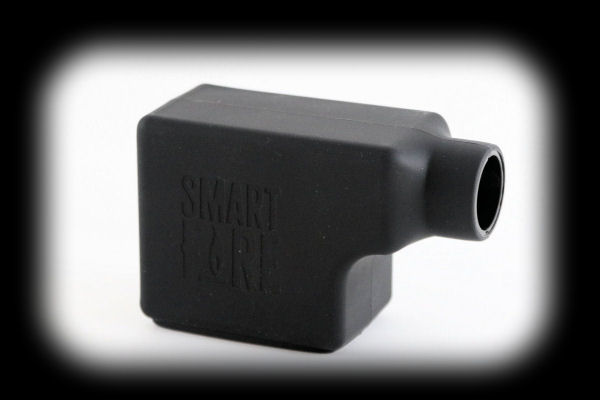
The Primo Plus/Smartfire App
There are two Apps, the Primo Plus App and the Smartfire App. They are extremely similar, so
we'll just show you some of the important screens/functions from the Primo Plus App.
The Home Screen:
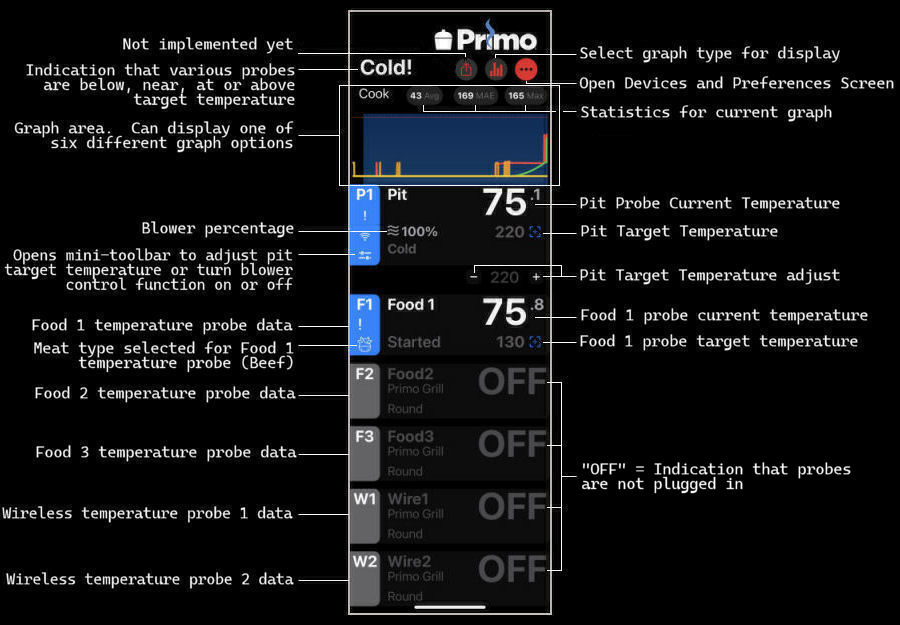
The following screen is what we'll call the "Home" screen for the App. This is the screen
that appears when you first start up the App. The screen is rather busy and has a number
of things that display depending on the current state of things. We have dissected a representative
version of the screen for you:
Graphing Options:
As we showed you above on the Home screen, there is
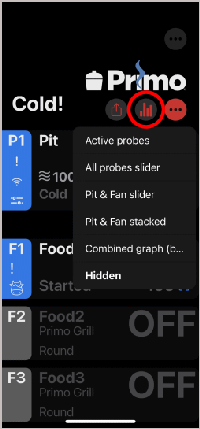
an area of the display dedicated to graphs. You have six options for graphs: Hidden, Active probes,
All probes slider, Pit & Fan slider, Pit & Fan stacked, and Combined graph. To select the graph option,
tap on the circle that has four vertical bars in it. Here are the options:
 |
 |
 |
 |
1. To select a graph option, tap on the circled icon with four vertical bars. You will get a small dropdown that allows you to select an option. |
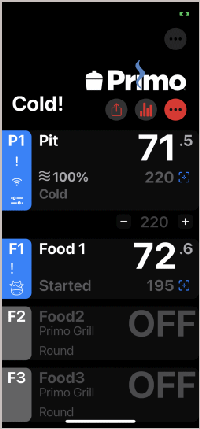
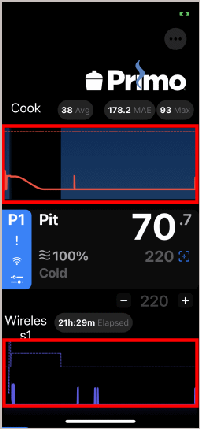
2. This is the "Hidden" option. As you can see, there is no graph displayed in the graph portion of the display. |
3. With the "Active probes" option, you get a small graph of temperature versus time displayed with each active probe. |
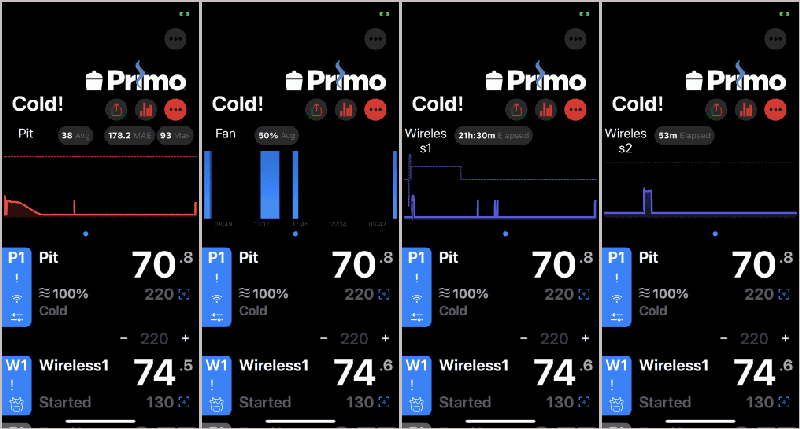
4. This is the "All probes slider" option.
The graph area will automatically scroll through all the active probes as well as the fan. |
 |
 |
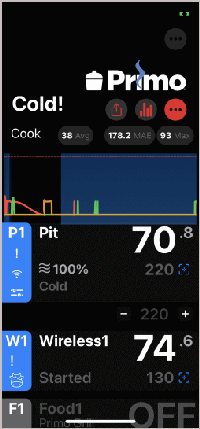 |
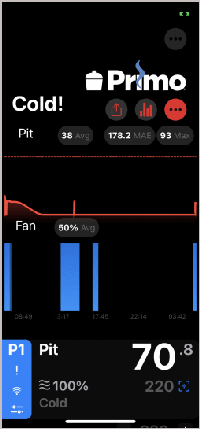
5. With the "Pit & Fan stacked" option, the graphs for the
pit probe and fan are "stacked" one above the other. |
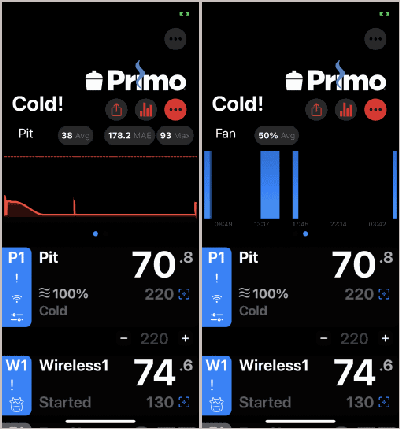
6. This is the "Pit & Fan slider" option. With this option,
the graph area scrolls through just the pit probe and the fan. |
7. Finally, this is the "Combined graph" option.
All the graphs are combined into one graph. |
When displaying a graph, you can tap on the various plots and a small bubble will pop up giving you the value being
graphed at that point. In the following two images, we have turned our phone sideways and tapped on the pit temperature
line and the blower line:
Pit Setup Screen:
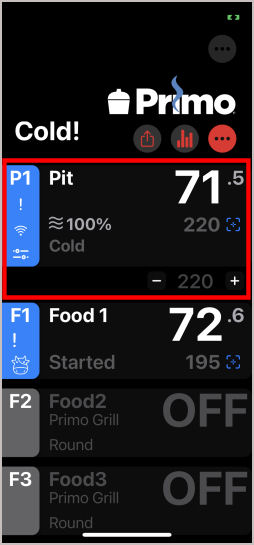
If you need to configure your pit probe and/or cooker settings, you need to go
to the Pit Setup screen:
 |
 |
 |
1. To access the Pit Setup Screen, tap on the entry for the pit probe. |
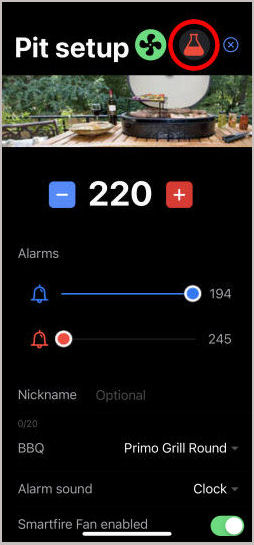
2. Here you can turn the fan control on or off (green fan icon or button at bottom),
set the target termperature, set low and high alarms, give your controller a nickname, configure the
type of cooker you have, and set the alarm sound. Click on the little flask icon to go to the advanced settings. |
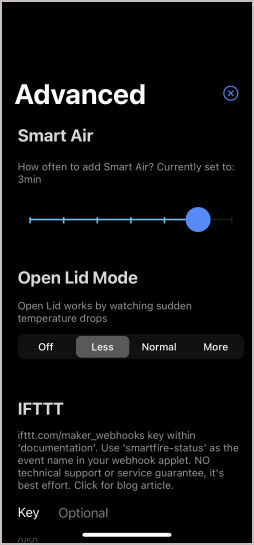
3. On the Advanced settings screen, you can configure the Smart Air option and the
Open Lid Mode setting. |
Food Probe Setup Screens:
If you want to configure the settings for your food probes, you need to go to Food Setup Screens:
 |
 |
 |
 |
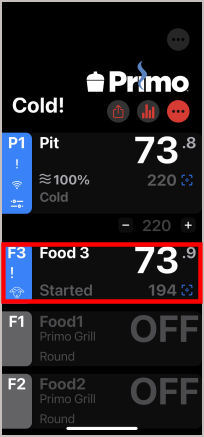
1. To set up a food probe, tap on the entry for that probe on the "Home" screen. |
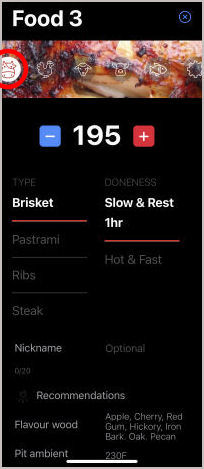
2. Here you can select the type of meat (Beef), the cut, doneness, give the probe a nickname and view cooking recommendations. |
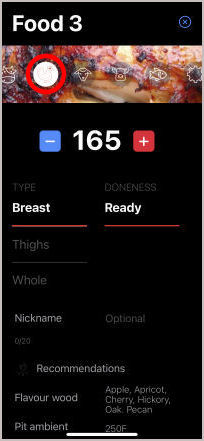
3. The food probe setup screen for Chicken. |
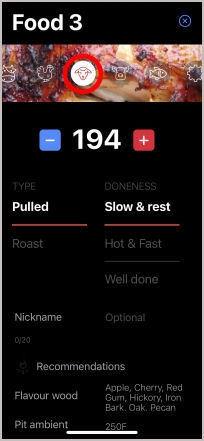
4. The food probe setup screen for Lamb. |
 |
 |
 |
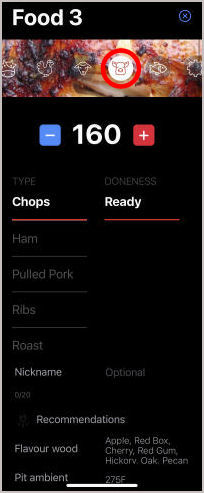
5. The food probe setup screen for Pork. |
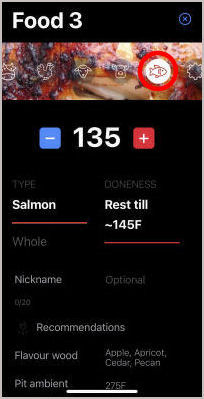
6. The food probe setup screen for Fish. |
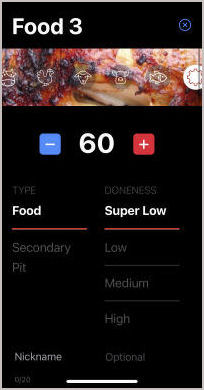
7. The food probe setup screen for Other. |
The following table lists all the choices you have for cuts and doneness for each type of meat. Each
selection will provide a suggested cooking temperature which you can adjust if necessary:
| Type of Meat | Cut of Meat | Doneness |
| Beef |
Brisket |
Slow & Rest 1hr
Hot & Fast |
| Pastrami |
Wet cured
Slow & Rest 1hr
Hot & Fast |
| Ribs |
Rest 1hr
Hot & Fast |
| Steak |
Reverse sear
Rare
Medium rare
Medium
Well done |
| Chicken |
Breast |
Ready |
| Thighs |
Ready |
| Whole |
Ready |
| Lamb |
Pulled |
Slow & rest
Hot & Fast
Well done |
| Roast |
Rare
Medium rare
Medium
Well done |
| Pork |
Chops |
Ready |
| Ham |
Ready |
| Pulled Pork |
Low & Slow
Hot & Fast |
| Ribs |
Rest 1hr
Hot & Fast |
| Roast |
Ready |
| Fish |
Salmon |
Rest till ∼145F |
| Whole |
Ready |
| Other |
Food |
Super Low
Low
Medium
High |
| Secondary Pit |
Low
Medium
High
Danger |
Other Miscellaneous Screens:
There are two other screens that you will probably encounter while using the Primo Plus/Smartfire,
the Recent Cooks screen and the Preferences Screen:
 |
 |
 |
 |
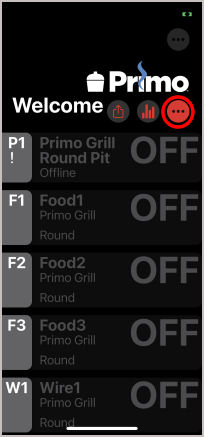
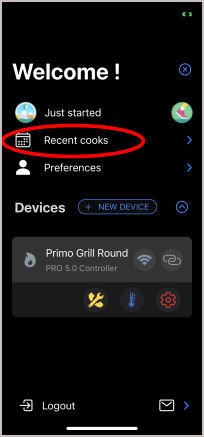
1. Tap on the red circle with three black dots. |
2. Tap on the "Recent cooks" icon. |
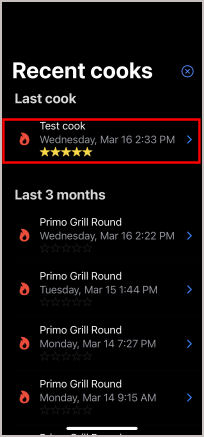
3. Recent Cooks: Here you will see a list of recent cooks. Tap on any entry to see the cook. |
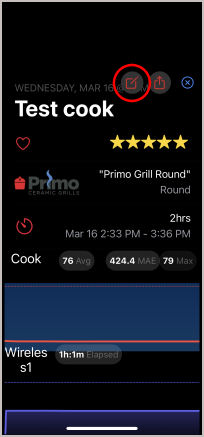
4. You will be presented with all the relevant data for that particular cook. Tap on the "Edit" icon to edit the cook. |
 |
 |
 |
 |
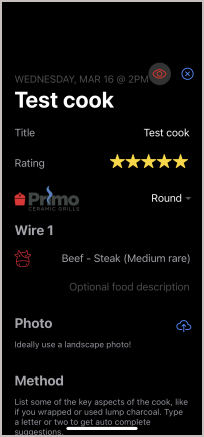
5. Edit Cook: On this screen you can change the title of the cook and give it a rating. |
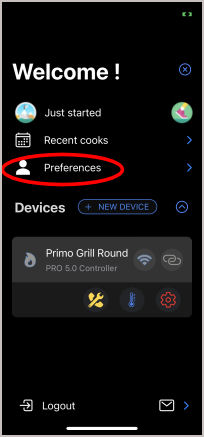
6. If you tap on the "Preferences" icon, you will be taken to a screen where you can set some options. |
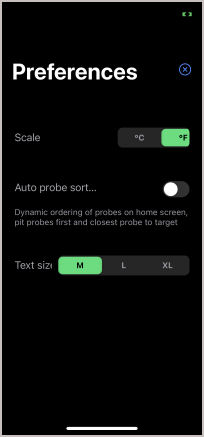
7. Preferences: Here you can select the temperature units, whether or not to auto-sort the probes on the "Home" screen, and the text size. |
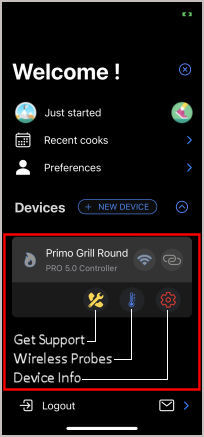
8. Get Support, Wireless Probes, Device Info: Finally, this "Welcome" screen gives you access to screens where
you can get support, configure wireless probes, and view device into. |
Access To Raw Data
Some users find it useful to access the raw temperature and blower data so they can graph it themselves
and possibly do some sort of analysis on it. At present, access is not provided to the raw data.
Amazon Echo/Alexa Support
The Primo Plus/Smartfire controller does not support Amazon Echo/Alexa or Google Assistant.
←Previous Page
Next Page→
nakedwhiz.com
Home
Search Our Site
Email The Whiz
Listen To Whizcast
Whizlog
Buy Whiz Gear
Privacy Policy
All Contents ©2001, 2023 The Naked Whiz
International Association of Fire Safety Science member #1604
You can support this website by shopping at
The Naked Whiz Website Store and
Amazon.com
 |
You can make donations to The Naked Whiz
Website using Bitcoin! Scan the QR code at
left or copy and paste our wallet ID:
1Bt4vjU9PUQNVvEZZq6ik6jWYr6nr4rJRp
|
 |
|
|


