 |
 |
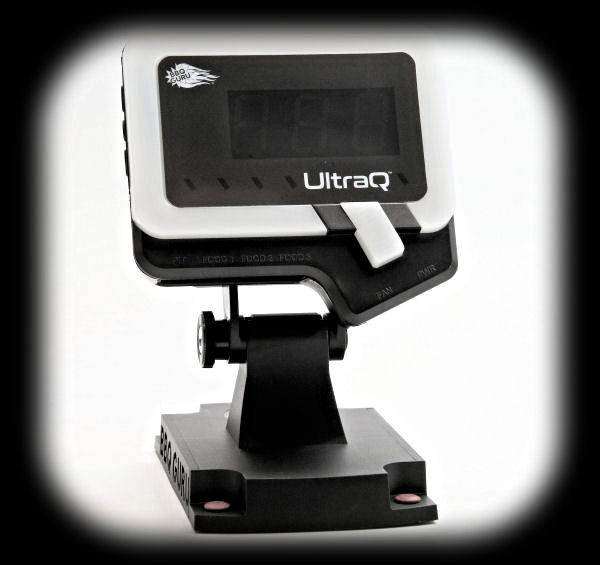
There are a number of features and functions available to owners of UltraQ controllers at www.ShareMyCook.com. We'll show you some of the basic features here, but feel free to go explore on your own as anyone can create an account. When you sign on to the Share My Cook website, you will first be taken to the Share My Cook Dashboard. As you can see, here you can view the current and target temperature for each probe. You can click on the "Edit" buttons to change the target temperature. You can also see the fan output and timer value. Clicking on the "Advanced Device Settings" link will take you to the next screen. 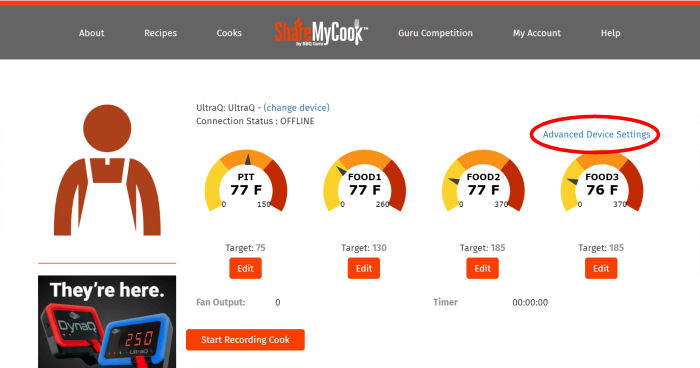 When you click on "Advanced Device Settings" link, you are taken to the "Current Status" tab. As its name implies, it shows the current status of your UltraQ controller. Here you can monitor the temperature of all the probes, the current status of the timer and the current blower output value. You can also set temperature alarms for each probe and you can set a new timer. Finally, off to the right you can view a little progress indicator on where the current temperature of each probe lies in relation to the target temperature.  This next screen shows the "System Setup" tab. On this screen you can set your Alarm Beeps, beep duration, turn the LED lights on or off, enable display scanning and remove your UltraQ from ShareMyCook.com. 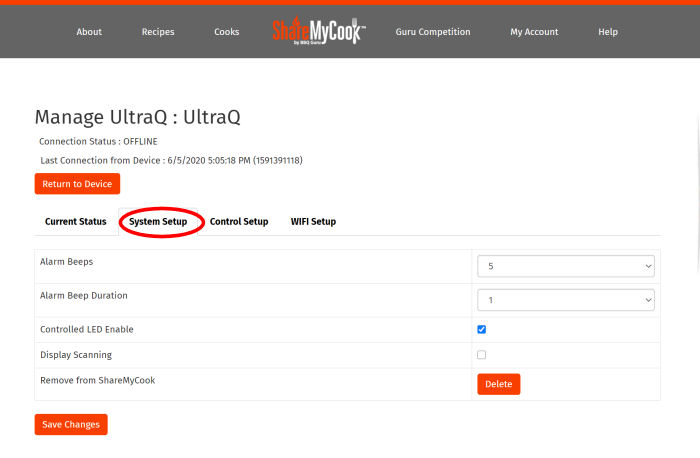 Next we have the "Control Setup" tab. Here you can specify a cook hold temperature, the timeout action for when the timer expires, the range of temperatures outside of which the alarm will sound, turn Ramp Mode on or off, turn Open Lid Detect on or off, and set Smart Cook setting. 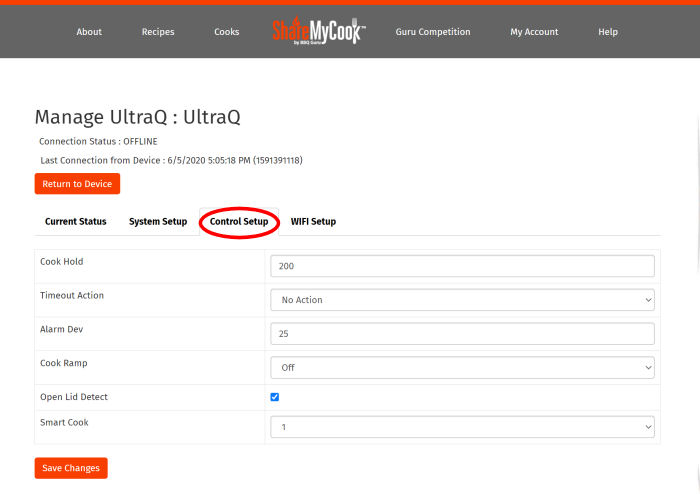 The final tab on the Dashboard is the "Wi-Fi Setup" tab. Here you can alter all the Wi-Fi parameters. Hopefully, you will never need to use this screen as the BBQ Guru App Wi-Fi set up tool should have gotten you connected to your network without doing any manual twiddling. 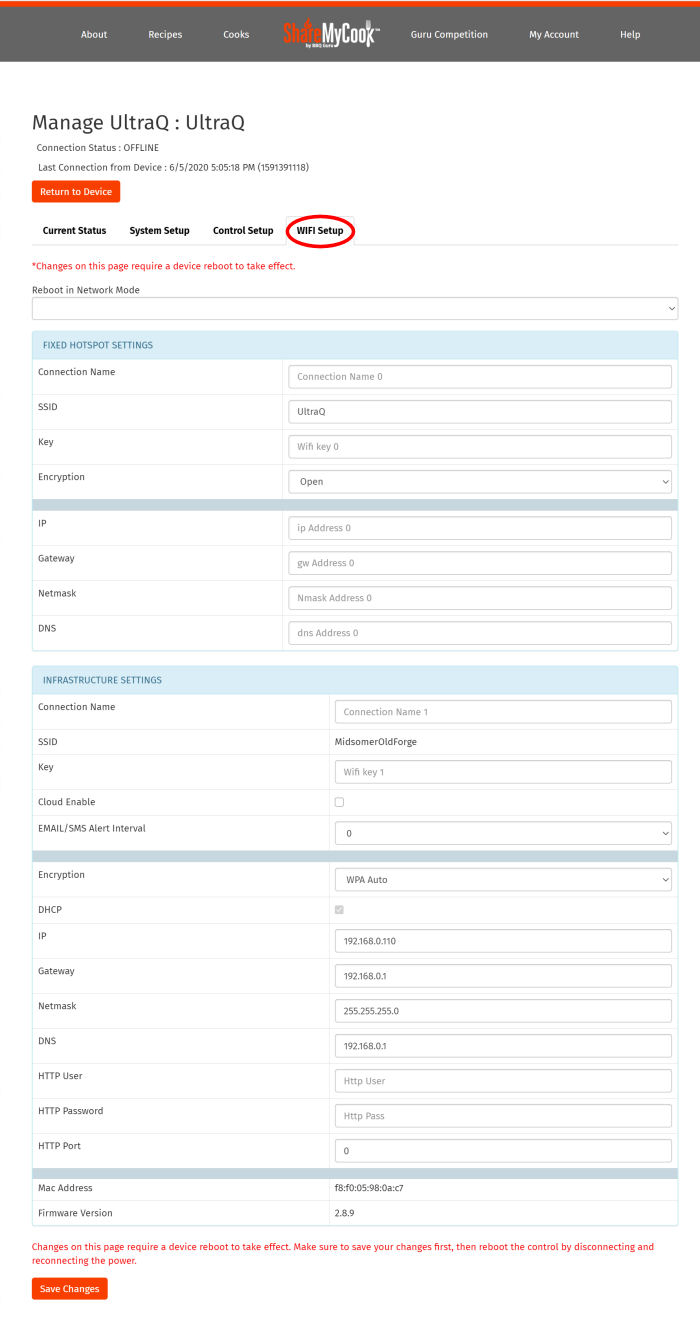 Clicking on the "ShareMyCook" icon at the top of each page will return you to the Dashboard.  This next screen shows where you can set up all your notifications and alerts. At this time, you cannot do this in the BBQ Guru App. Rather, you must log in to ShareMyCook.com. You access this screen by clicking on the "My Account" tab at the top of the screen and then selecting "Notifications" from the drop-down list. Notice also the last item on the list called "Notification Interval". This allows you to tell ShareMyCook.com that you would like to receive a text message at the specified interval that contains the status of all your probes. 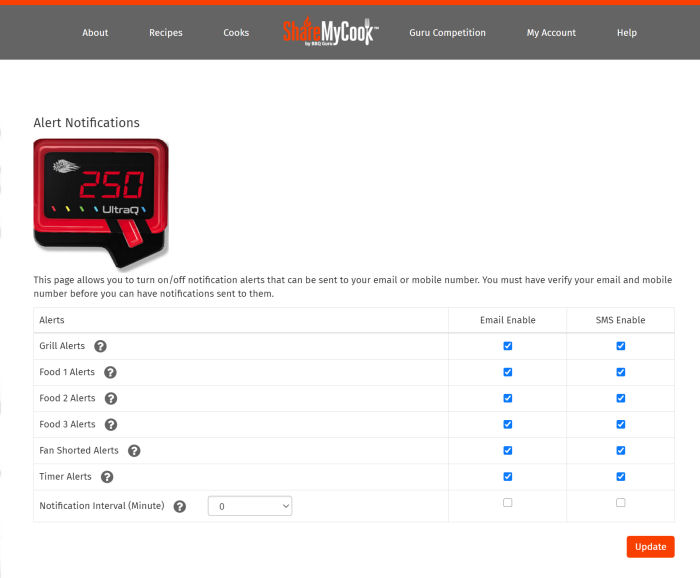 One final function we'll show you is the graphing that is available. If you click on My Account→My Recorded Cooks, you will be taken to page showing all your recorded cooks. 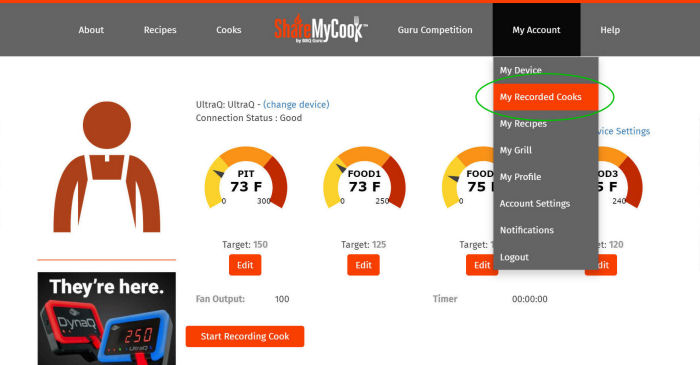 Here you can see all your recorded cooks. Find the cook you are interested in and then click on "View Cook". 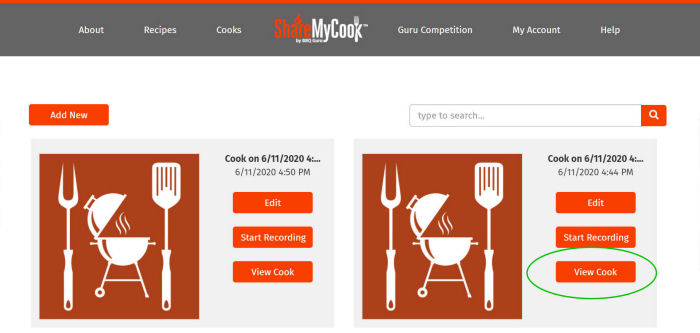 Here you now can see a graph of your cook. If you click near one of the one-minute readings, you will be shown the state of the four probes at that point. Unfortunately, the state of the blower isn't available. Notice also the little download icon in the upper right-hand corner of the graph. Click on it to be shown options for downloading either an image of the graph or the raw data itself. 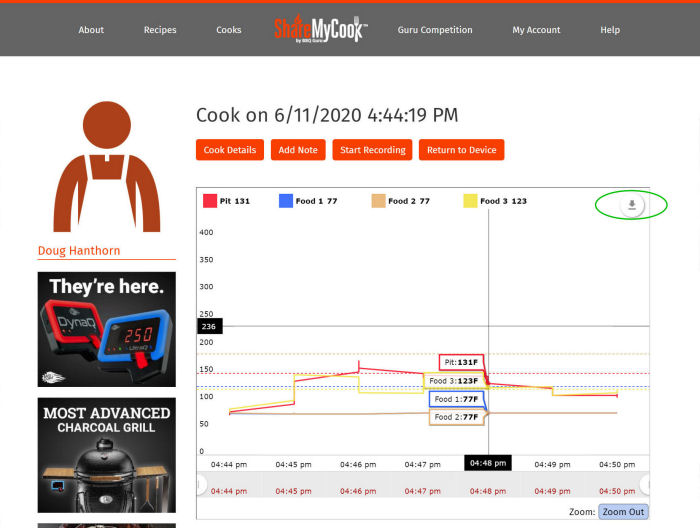 Click on the "Download as..." button to download the graph in various graphic formats such as .JPG or .PDF. In this case we have clicked on the "Save As..." button to download the raw data. We then clicked on the "CSV" button and the graph's data was downloaded as a .CSV file. (We notice that "XLSX" doesn't work.) 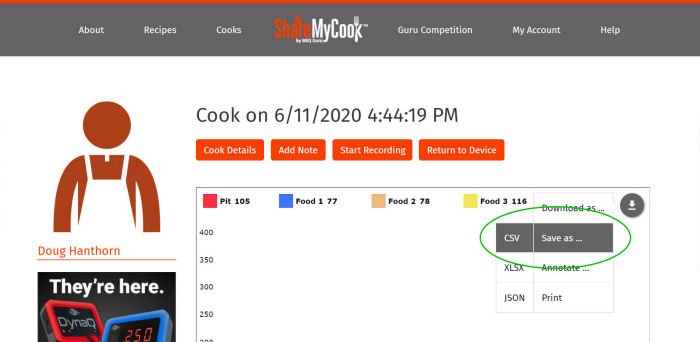 Here is what the .CSV file looks like. Notice that the data readings are more frequent than the once-a-minute data points shown on the graph. Using the .CSV file, you can create your own graph and have a little more resolution: 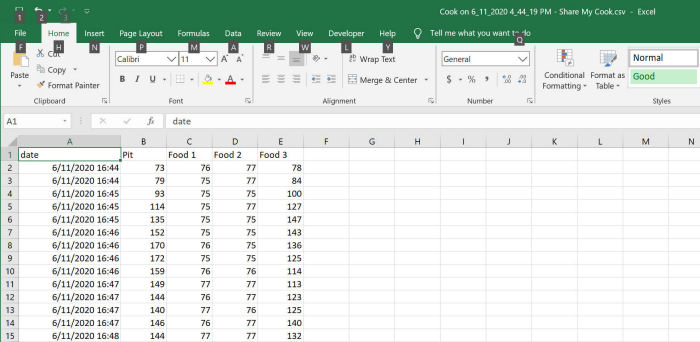 Those are the basic features provided by the web site. There are loads more that we won't go into here, but here's a list of some of the additional features available:
You can use any Amazon Alexa-enabled device to use voice commands to control and monitor your UltraQ controller. Simply use commands/ask questions like "Alexa, tell UltraQ, set the pit temperature to 250" or "Alexa, ask UltraQ, what's the temperature of Food 1?" Alexa will interface with the Share My Cook website to respond. The procedure for setting up Alexa to do this is quite simple, so we won't show you how to do it here, but BBQ Guru has a Knowledgebase article on how to do it. Here are a few observations about using Alexa to work with your UltraQ device:
For a list of Alexa Voice Commands that you can use, read this article at the BBQ Guru Knowledgebase. Frankly, we don't see much value in using Alexa for this, but then again, you can purchase a refurbished second generation Echo Dot from Amazon for about $25, so if you are curious, it doesn't take a large investment to get started.
All Contents ©2001, 2023 The Naked Whiz International Association of Fire Safety Science member #1604 You can support this website by shopping at The Naked Whiz Website Store and Amazon.com
|