 |
 |
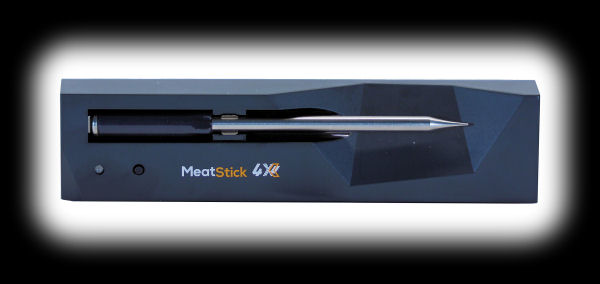
Cooking With The MeatStick 4X
First of all, let's take a look at what a cook looks like on the App when using the MeatStick 4X.
This animation shows a series of screenshots taken at 1-minute intervals while we were cooking
the beef Eye of Round that you will see below.
(Refresh the page by pressing "SHIFT" and hitting the reload button to restart the animation.)

So now that you have seen what a cook looks like, let's take a look at the how the MeatStick 4X handled cooking a variety of foods. We cooked a baked potato, a beef eye of round, and a pork butt.
Baked Potato: You won't find vegetables in any of the cooking types in the MeatStick App. However, a baked potato will cook relatively quickly, there will be no "stall", so it should be a simple relatively linear cook. It should be about as easy a cook for the MeatStick to predict the finish time, so let's start with the potato.
So in order to cook our baked potato, we chose a Quick Start cook, selected a target food temperature of 210°F and a target ambient target of 400°F (not that we really cared about the ambient temperature). We also changed the name of the cook to "Baked Potato 3" and proceeded to cook.
 1. When you set up the cook, select "Quick Start" from the Cooking Methods screen. |
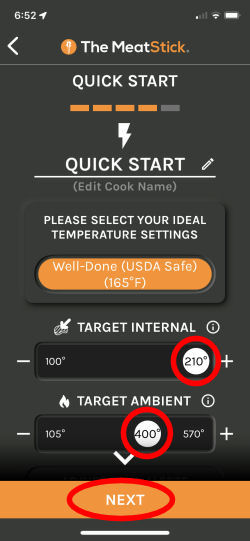 2. Select your Target Internal and Target Ambient temperatures and tap on "NEXT". |
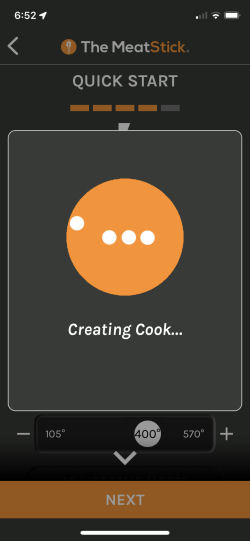 3. The App will then create your cook. |
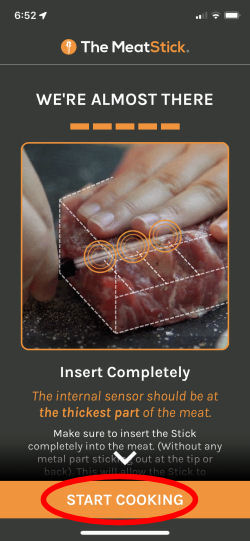 4. The App will then remind you to insert the probe all the way into the food. Tap on "START COOKING" to begin the cook. |
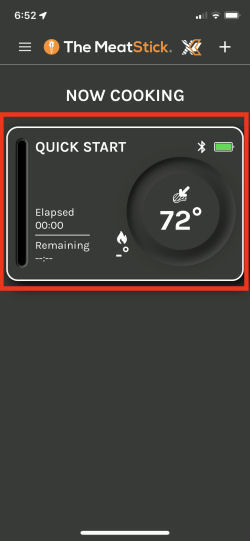 5. You will be returned to the "NOW COOKING" screen where you can tap on the probe entry. |
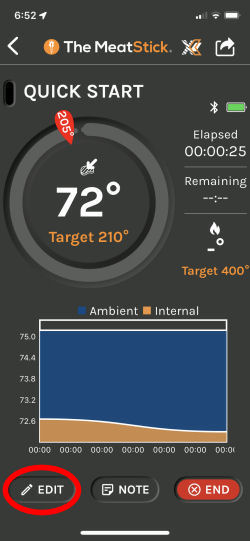 6. This will take you to the full screen for your cook. We forgot to rename the cook, so we tapped on "EDIT". |
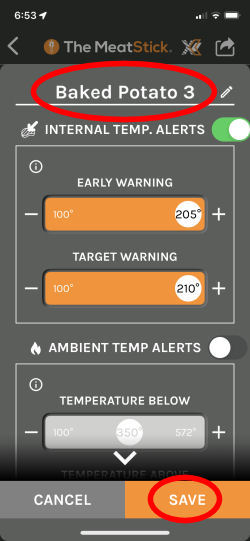 7. Here we were able to edit the name of the cook and call it "Baked Potato 3". Tap on "SAVE". |
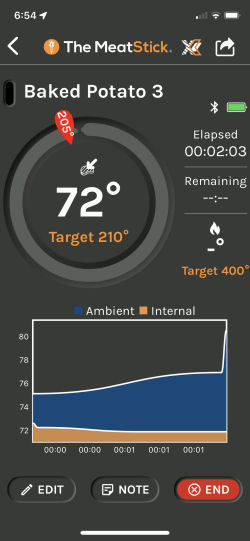 8. You are then returned to the full screen for your cook. |
So, here's a photo of the potato before we placed in the oven. The point of this photo is to show you how the probe should be inserted all the way into the food.
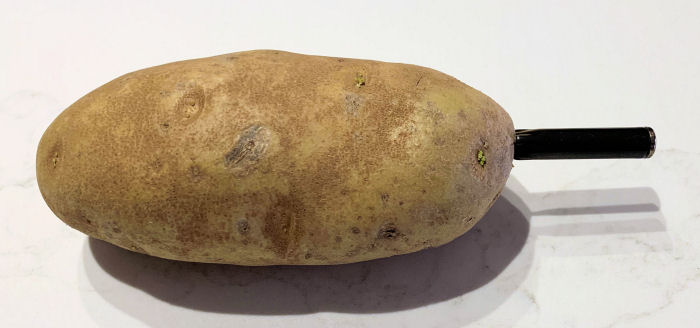
Photo of the potato with the probe inserted all the way.
Your cook will then proceed until the food reaches the target temperature that you set:
 9. When the food reaches your target temperature, you will get this pop up screen. Tap on "OK". |
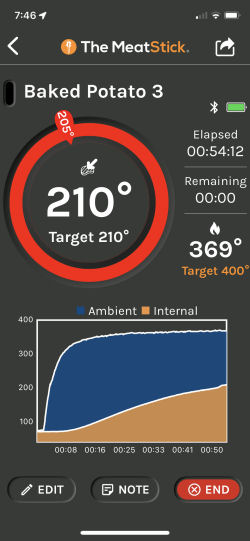 10. You are then returned to the full screen for your cook. |
Here's the graph produced by the MeatStick App showing how the baked potato cook went. As you can see, it's rather boring. The temperature simply rose until the potato hit 210°F when we took it off the cooker.
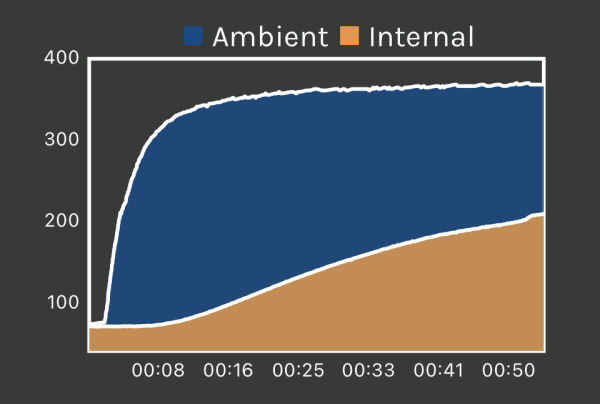
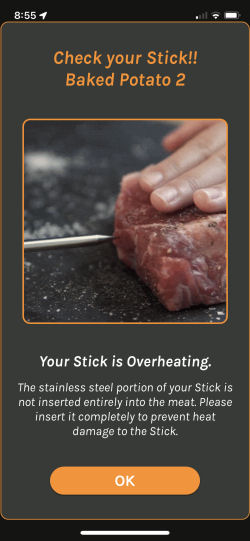
One other very important thing that we learned when cooking this baked potato. When cooking foods to higher temperatures (like this baked potato, for example), you may get "high temperature" warnings from the App. We did in fact receive multiple warnings that our MeatStick was overheating:
 |
 |
Beef Eye of Round: Cooking a beef eye of round is pretty straightforward. The MeatStick App does not have an option for eye of round under the Smoke category, so we picked the option for Beef Eye of Round under the "Oven" cooking method. The only difference it might make is in the selection of the target temperatures, and of course you are free to tweak them on your own.) As we mentioned earlier, the MeatStick probe no longer has a minimum insertion line etched onto the shaft. You must insert the probe all the way to the black ceramic handle. In light of our experience with the baked potato, we would highly recommend inserting the probe even further than what is shown in the following photo:
The MeatStick App chose a warning temperature of 130°F and a final target temperature of 135°F which was fine by us. We took the meat out of the cooker when it hit the warning temperature and let it rest until it hit the final target temperature. As you can see, the meat was a perfect medium, all ready for pit beef sandwiches.
Below is the graph of the cook which was generated by the MeatStick App. As you can see, it's pretty simple with an eye of round. The temperature simply rises at a steady rate until done. There is no "stall".
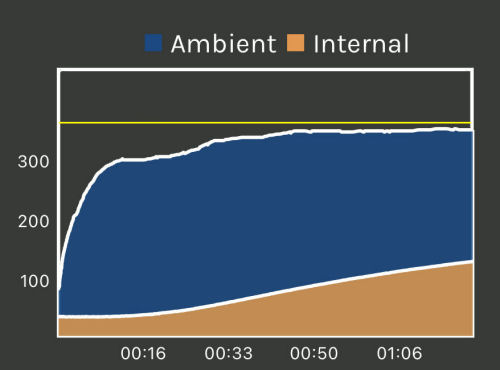
MeatStick App's graph of the Eye of Round Cook.
We would like to point out one other thing. We have added the yellow horizontal line to the graph. It represents the actual ambient temperature in the cooker, 375°F, as measured by the temperature controller used to keep the cook at a constant temperature. The MeatStick 4X ambient reading never rose above 358°F during the cook. The ambient sensor on the MeatStick does not give you an accurate indication of your cooker's overall temperature. Rather, it shows the temperature of the air at one specific location about an inch away from the surface of the big piece of meat. The temperature of the meat itself and the evaporative cooling that goes on at the surface of the meat influences the ambient reading from the probe. We would stress that the ambient reading from the probe is intended to be used by the MeatStick's App in order to assist in predicting the finish time, not for monitoring the temperature of your cooker. Use it however you want, but don't be surprised when it doesn't give you the readings you are expecting.
Pork Butt: We had intended to cook a pork butt in order to see how the MeatStick App deals with the "stall" that occurs when cooking pieces of meat like pork butts and briskets. However, without the MeatStick Wifi Bridge to assist us, we would have had to sit by our cooker for 12 hours to gather the necessary data. (The predictions of the time remaining are not logged, so we have to just watch the App and log them ourselves.)
So there's not much to report except the MeatStick gave accurate temperatures and when the App said the butt was done, well, the butt was done. See below for our comments on how the MeatStick 4X predicts cook times when there is a stall involved.
Predicting Cook Times
Obviously, one of the major improvements to the MeatStick 4X is its four temperature sensors, versus the two sensors found in
the previous MeatStick probe. This should enable better predictions for cook times since the App now has more data about
the temperature inside the food. So we recorded the time predictions when we cooked
the baked potato to see how it did.
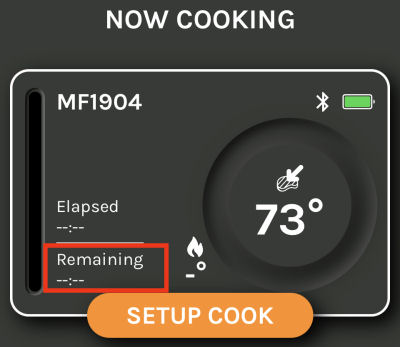
First, let us point out where you see the cook time prediction in the App. You may have noticed that on the cook screen and on the probe entry there is a field labeled "Remaining":
 |
 |
This "Remaining" field is telling you how much time the MeatStick thinks is remaining until your food is done. To look at the effectiveness of this feature, when cooking the foods above, we recorded when the MeatStick produced its first prediction, and then recorded its predictions.
Baked Potato: Our first food was the baked potato. For this cook we recorded each and every time that the "Remaining" field was updated. We then graphed the predicted finish time versus the actual finish time in order to graphically show how accurate the MeatStick is in predicting the cook time:

So, the actual cook time was 54:12. The MeatStick produced its first estimate at 18:02 into the cook (about 33% of the way) when the potato had reached 104°F. As you can see from the blue line, the MeatStick's predictions were primarily low for the middle part of the cook. Towards the end of the cook, the predictions were a little high. Over the course of the cook, however, the average error in the predicted finish time was only 3 minutes and 36 seconds which is pretty good.
So it appears that the MeatStick 4x does indeed produce reasonable predictions for the cook time on something that doesn't have a stall.
Eye of Round: Our next food was a Beef Eye of Round. We wanted to observe the predicted cook time for a more conventional piece of meat rather than a vegetable from the nightshade family. For this cook we recorded at one-minute intervals. Again we graphed the predicted finish time versus the actual finish time in order to graphically show how accurate the MeatStick is in predicting the cook time:
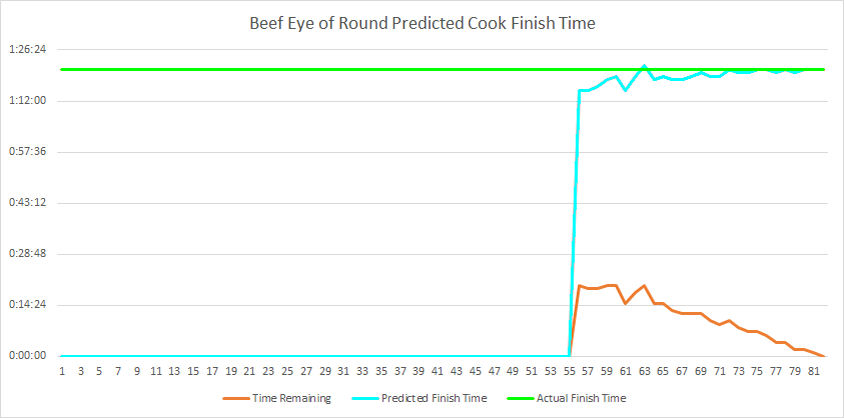
So, the actual cook time was 01:20:58. The MeatStick produced its first estimate at 55:36 into the cook (about 69% of the way) when the meat had reached 104°F. As you can see from the blue line, the MeatStick's initial predictions were again primarily low. However, by the end of the cook, the predictions were essentially bang on. Over the course of the cook, the average error in the predicted finish time was only 1 minute and 57 seconds which again is quite good.
So again, it appears that the MeatStick 4x does indeed produce reasonable predictions for the cook time for large pieces of meat that don't have a stall.
Pork Butt: As we stated above, we couldn't collect data on the predictions of remaining time in order to see how the MeatStick App does in predicting cook times for pieces of meat with a stall. However, we did keep an eye on the cook as much as possible and we can tell you that the MeatStick does not handle the stall. It initially produced absurdly short cook times as the temperature of the meat rapidly rose, began to stretch out the cook time once the meat entered the stall, and finally shortened up the prediction as the meat exited the stall and the temperature began to rise. But based on our observations of the Eye of Round cook, we have no doubt that once the butt exits the stall, the predictions should be quite good.
Predicting Cook Time Conclusions: The MeatStick 4X appears to be able to do a better job of predicting the final cook time than the previous version of the MeatStick did. The previous MeatStick gave initial predictions that were pretty inaccurate and then zeroed in on the actual time as the cook progressed. The MeatStick 4X produces reasonable initial predictions that only get better as the cook progresses, as long as there is no "stall" involved.
You can support this website by shopping at The Naked Whiz Website Store and Amazon.com
|