 |
 |

The App
The ThermoPro Twin TempSpike system is enhanced with the use of its App. Here are the more important screens:
 1. When you first start the App, you get this "Welco..." screen which then disappears. |
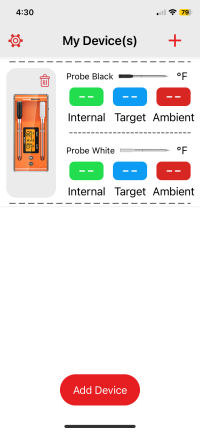 2. After a few seconds, up pops the "My Devices" screen which lists all the Boosters you have paired with your phone. |
 3. If you remove the probes, then temperature values will appear. Tap on the probe you wish to work with. |
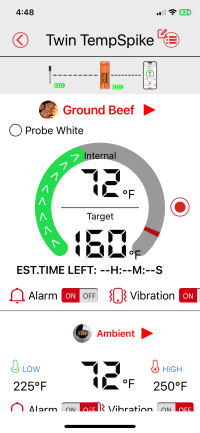 4. You will then get a detailed screen with all the information about that probe. |
 |
NUGGET ALERT: You must leave the App active if you want to receive alarms during your cook. |
So let's now breakdown the detailed probe screen:

The Probe View
Managing Cooks Via The App
The ThermoPro Twin TempSpike has a rather bizarre notion of what constitutes a "cook". You can start a cook
by selecting a type of meat and a target temperature. The App will give you a time estimate for the
completion of the cook. But there really isn't a way to stop a cook except by telling the App that the
probe doesn't have a "profile".
That's odd enough but what is even more bizarre is that the App collects graphing data independant of any cook that you are performing. Starting and stopping collection of graphing data is done totally independant of starting or "stopping" a cook.
That said, let's briefly show you how to set up a cook using the App. It's quite simple because you have very few options.
Setting Up A Cook: When you set up a cook, you select a meat and target temperature:
 1. We'll start off again by starting the App. |
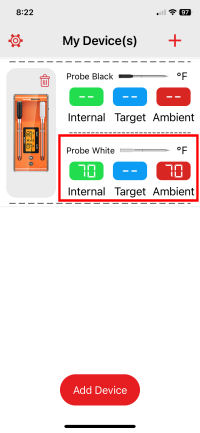 2. The "My Devices" screen will display. Tap on the probe that you will be cooking with. |
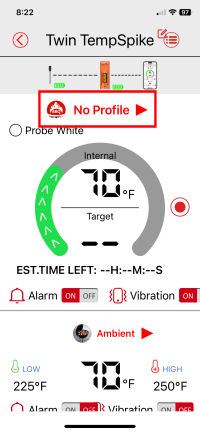 3. Begin by tapping on "No Profile". |
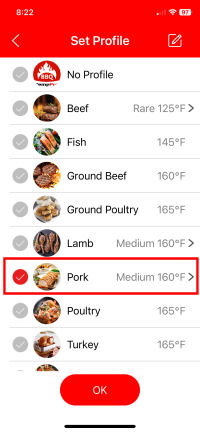 4. Here you can select the type of meat you will be cooking. We'll tap on "Pork". |
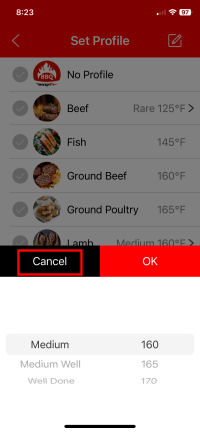 5. The default target for pork is 160°F, which is silly. We'll tap on "Cancel". |
 6. Tap on the "Edit" icon in the upper right hand corner. |
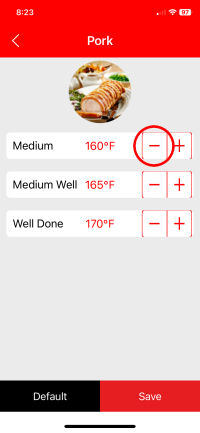 7. The App shows you the default temperatures defined for pork. We'll tap on the "-" sign to lower the temperature for medium. |
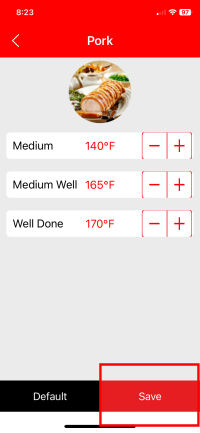 8. We'll choose 140°F for the new default, then tap on "Save". |
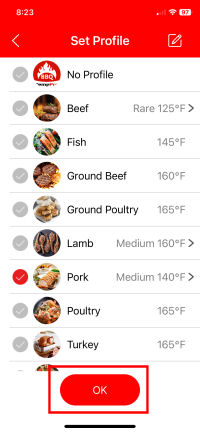 9. Tap on "OK". |
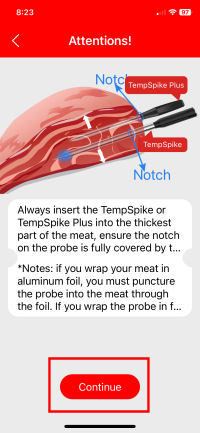 10. Read the screen and then tap on "Continue". |
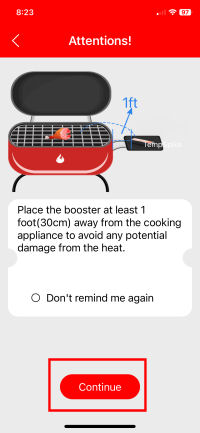 11. Read the next screen and then tap on "Continue". |
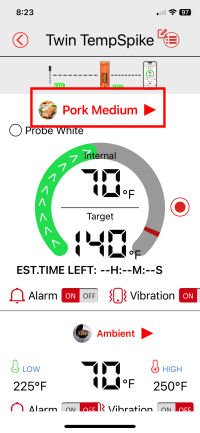 12. Now you are set up for cooking Pork to a Medium temperature with a target of 140°F. |
Editing A Cook: Once you have a cook started, you may then edit it, which consists of simply changing the target temperature. We'll change our target from 140°F to 145°F):
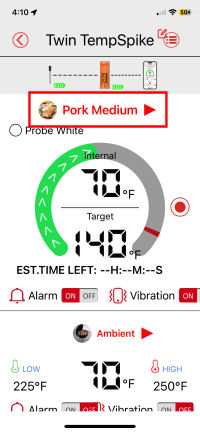 1. While displaying the screen for the probe you wish to edit, tap on "Pork Medium". |
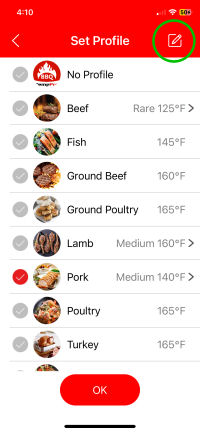 2. Tap on the "Edit" icon at the top right of the screen. |
 3. Tap the "+" button for the Medium setting until you hit 145°F. |
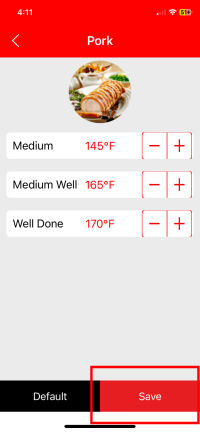 4. Once you have the temperature you want, tap on "Save". |
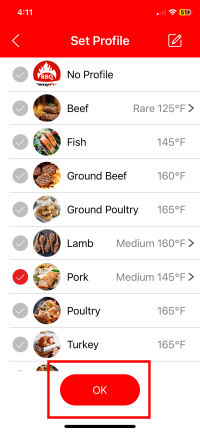 5. Tap on "OK". |
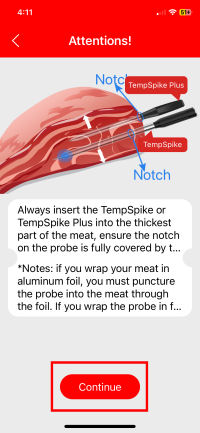 6. Tap on "Continue". |
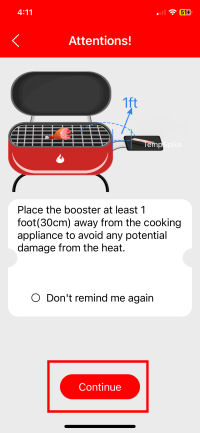 7. Tap on "Continue". |
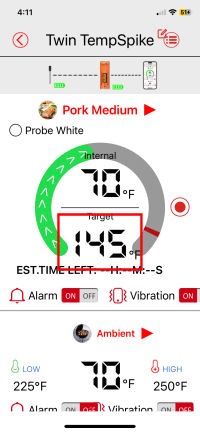 8. You now have a new target temperature of 145°F. |
Stopping A Cook: Stopping a cook requires only that you stop the cook:
 1. While displaying the screen for the probe you wish to stop, tap on "Pork Medium". |
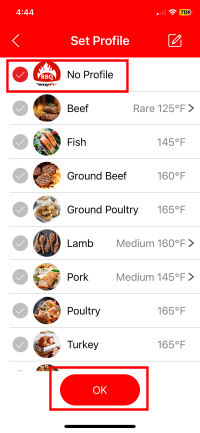 2. Tap on "No Profile" and then tap on "OK". |
 3. Now the probe screen says "No Profile" and you have no target temperature. |
Recording A Cook: In the TempSpike App, you don't really record a cook. You record temperature data independant of whether or not you have started a cook by choosing a "Profile". You have no access to the actual data, but rather to a graph that the App creates. Some of the other oddities of "Recording Temperature Data" are:
In any event, here is how you record temperature data:
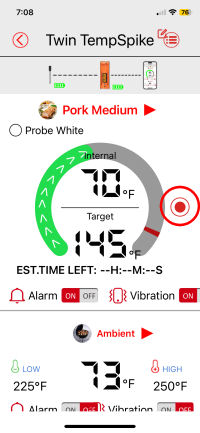 1. While displaying the screen for the probe you wish to record, tap on the record button. |
 2. The App asks you to confirm, so tap on "OK". |
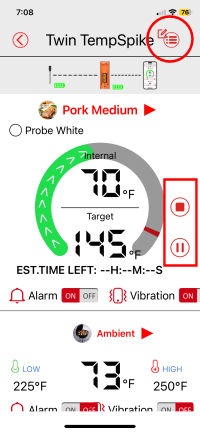 3. Now instead of a record button, you have stop and pause buttons. To view the graph tap on the icon in the right upper corner of the screen. |
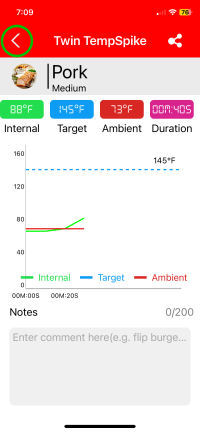 4. The graph is displayed. Notice the lack of a time, date or probe indication. Tap on the back arrow to return to the probe screen. |
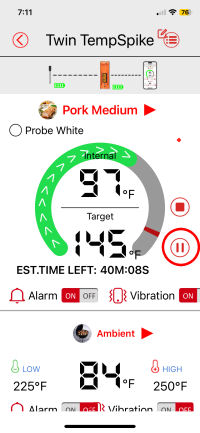 5. To pause recording, tap on the pause button. |
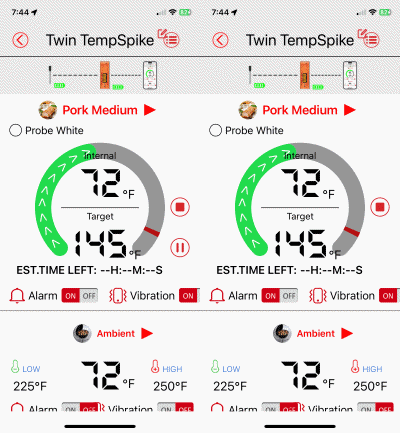 6. While recording is paused, the pause button will flash on and off. To resume recording, tap on the Pause button again. |
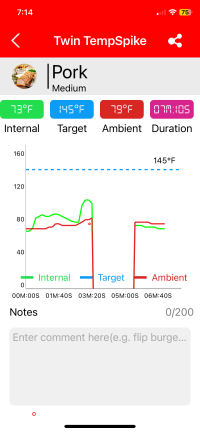 7. This is what the graph looks like if you view it while recording is in progress. See the gap? |
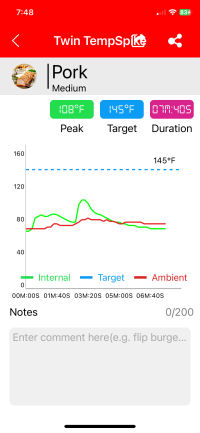 8. Here is the same graph a few seconds later, displayed after recording was stopped. Where did the gap go? |
 9. To stop recording, tap on the Stop button. |
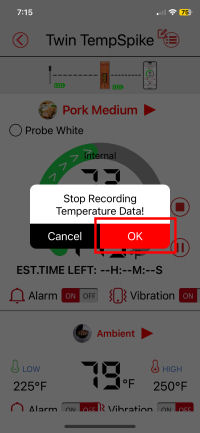 10. Again the App will ask you to confirm that you wish to stop recording. Tap on "OK". |
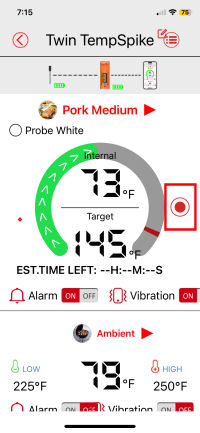 11. The Pause and Stop buttons disappear and are replaced with the Record button. |
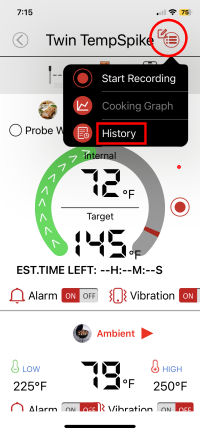 9. To view previous cooks, tap on the icon at the top right corner of the screen. Then tap on "History". |
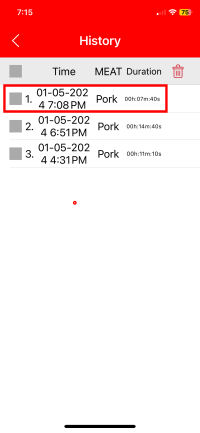 10. Tap on the cook you wish to view. |
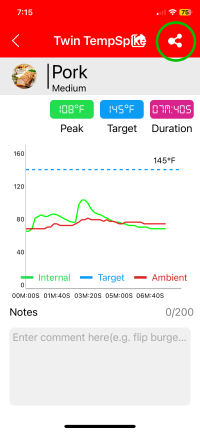 11. The graph will display. To send and image of the graph to someone, tap on the Share icon at the top right corner of the screen. |
 |
NUGGET ALERT: If you don't stop data recording, recording will automatically stop if the meat temperature reaches the target temperature and then drops 20°F. It will also stop recording if you exit the App. The TempSpike App can keep up to 100 graphs in memory. |
Alarms
Using the App, you can request an alarm to go off when the meat reaches the target temperature. You can
also set high and low alarms for the ambient temperature.
Updating The Firmware
Unlike most of these truly wireless thermometers, the TempSpike cannot update its firmware.
You can support this website by shopping at The Naked Whiz Website Store and Amazon.com
|