 |
 |

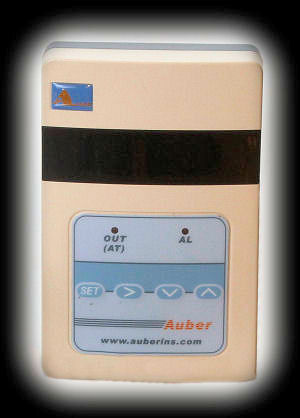
In the following photo we have turned the system unit on its back and show the bottom where the connectors are:
The connector on the far left is for power. You can either use the supplied "brick" power supply or you should be able to find acigarette lighter power cord that you can then plug into one of the many automobile starter batteries available which have a cigarette lighter outlet on them. The plug on the adapter must have a positive center connector. The connector in the middle is for the blower. The connector on the right is for the pit temperature probe. The pit probe provides the input to the Auber Instruments controller that allows it to monitor and control your cooker. The plug on the termperature probe has a wide pin and a narrow pin, so make you sure you insert the plug correctly. And since the unit uses a standard mini SMP connector and supports T, R, J, B, S, K, E and Wre3/25 thermocouples, you can use other types of probes than that which comes with the unit. The Auber Instruments controller comes with a temperature probe for monitoring the cooker temperature:
The probe is made from stainless steel and contains a thermocouple. The wire has an armor braid and can withstand temperatures up to 550°. The wire is 6 feet long, but you could order a custom probe from companies such as Thermoworks or Omega Engineering with a longer or shorter wire. Be careful not to kink the wire. The junction where the wire enters the probe appears to be sealed with epoxy although it is probably best to avoid immersing the probe in water. The probe and the wire should be shielded from direct radiation from a hot fire. Do not let it come into direct contact with flames. If you need to shield the wire, you can place a layer of aluminum foil beneath it. Also, having the pit probe itself exposed to direct radiant heat can cause it to register a temperature which is higher than the air temperature in the cooker, and thus fool the controller into cutting back on the fire. (If a probe does fail, you will be able to tell because when plugged into the controller with no heat applied to the probe, the controller will display "EEEE" indicating an error.) Also shown above is a closeup of the alligator clip which you can use to clip the probe to your dome thermometer or the food grid, as you see fit. How accurate is the probe? We calculated the boiling point of water at our location as 211.3°. We then immersed the end of the probe into boiling water and the controller registered 209°. Two degrees is certainly accurate enough for barbecue cookers, but if you do wish to adjust the unit, you can calibrate it to the probe. Since our unit seemed to be a bit off when measuring the probe accuracy, we used the following calibration procedure to calibrate it:
Now let's take a look at the blower which feeds air to the fire in the cooker. First off we have photos of the blower and the adapter:
(Note that in the above photos, we have the adapter incorrectly positioned 90 degrees from the way it should be used with a large or medium Big Green Egg cooker. We only discovered this later when we went to use it!) Looking down the nozzle you can see how the gravity-controlled damper is used to restrict the airflow from the blower. When the blower is operating the air forces the damper open. When the blower is not operating, gravity brings the damper back down. This restricts the natural draft that occurs when air flows through the blower while the blower is not forcing air into the cooker.
As for mounting, you can see in the photo above how the two ends of the spring wire can be pressed together and then inserted through the door adapter. When released, they spring open and hold the blower to the door adapter. (We didn't show it in the photograph, but you get a silicone rectangular gasket that goes between the blower and the adapter to help ensure an airtight seal.) The adapter then just fits into the grooves of the lower vent on your cooker. Door mounts are available for many popular cookers.
The Auber Instruments controller has two alarms that you can set. Each alarm has a high setting and a low setting. If the high setting is greater than the low setting, then the high settting is the temperature at which the alarm sounds if the cooker temperature goes higher, and the low setting is the temperature at which the alarm turns off. If the high setting is less than the low setting, then the alarm goes off if the cooker temperature drops below the high setting, and the alarm turns off if the cooker temperature rises above the low setting. Thus you can set one alarm to go off if the cooker gets too hot, and the second alarm to go off if the cooker temperature drops too far. The alarm tone is a fairly loud steady high-pitched tone. If you set the high setting equal to the low setting, then that alarm is blessedly disabled. One minor thing we'll point out is that the user's guide says that the unit comes shipped with the alarm 1 set to 250° and 249° for the high and low settings. Our unit came with them set to 250° and 240°. |
You can support this website by shopping at The Naked Whiz Website Store and Amazon.com
|